Tag Archives: cook

Haloumi: The Official Food of Australia’s Crappy Athletes

Haloumi 1Photography by Asia Upward, Styling by Ali Nardi

Admittedly that post title is not technically %100 true. Haloumi is not the official food of anything other than the following salad recipe, and Australia’s athletes are not %100 crappy. In fact, only Australians, particularly the Olympic commentators seem to think their athletes are crappy.

I love living in Australia mainly because the quality of life here is so great. High work wages, free health care, good weather, lots of space, the list goes on. And because Australia has all of these high standards for quality of living, I find that frequently on occassion Australians whine get mildly upset when they don’t get something they feel entitled too. And no where has this attitude been more apparent then the consistently negative and critical coverage of their own athletes in the Olympics.

A typical interview tends to go something like this (fictional discussion based on my own perception of commentators interviewing athletes):

Commentator: “How does it feel to get fourth when you were so close to getting on the podium?”

Athlete: “I’m so proud. It feels great to get to be at olympics and I gave it my all.”

Commentator: “Yes, but how disappointing is it not to get gold?”

Athelete: “I’m just so excited at what I accomplished and I’m looking forward to the next olympics in 4 years.”

Commentator: “Ok, but how does it feel to totally suck for not winning the gold, which is the only thing that matters,” and so on a so forth.

I’ve also never witnessed Olympic commentators who are so eager to see fellow competitors fall, crash, or slip so their athletes can gain a spot on the podium. I mean, is that really how you want to win? Hoping your opponent takes a fall trying something daring and worthy of gold while you play it safe? I don’t think so, and I don’t think Australia’s Olympic athletes do either, but hey, I can only speak for myself…

So this post is in dedication to Australia’s Olympic Athletes who I think are doing a pretty swell job in the most prestigious athletic competition in the world. Chumpy might have gotten wiped out in border cross, but man is he good looking. And David Morris didn’t win the gold, but he dressed in bright yellow for his follow-up interview which is just as good.

haloumi 2

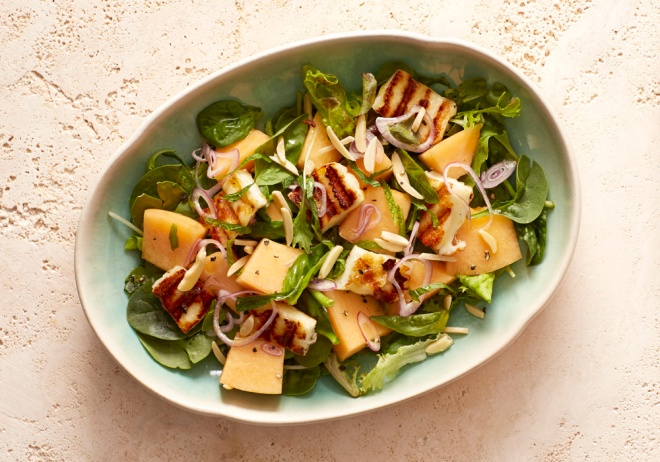
Australia loves haloumi, they support haloumi, they believe in haloumi. They should probably start treating their athletes more like haloumi short of eating them, and make this awesome Haloumi, Rockmelon (Cantalope), Almond and Basil Salad instead. Cook time is minimal, so you don’t have to linger by the heat on a sweltering Melbourne day, and it’s super simple to prepare so you can reserve your energy for things like walking down the block, or getting the lid off your water bottle which you have probably refilled at least ten times when Melbourne is at it’s worst. I serve it as a main–it is refreshing and filling, and won’t bog you down. It’s definitely worthy of a gold :)

haloumi 3

Ingredients:

  • 12  1/3″ thick slices haloumi cheese (it’s the “meat in this dish” so i don’t skimp!)
  • 1/2 rockmelon/cantalope, cut into bite size pieces
  • 1/4 cup chopped or slivered almonds, lightly toasted
  • 1/2 french shallot, thinly sliced
  • a handful of basil, leaves picked and large ones torn
  • a few handfuls mixed salad greens

For the dressing: Mix olive oil, fresh lemon juice, and sald and pepper to taste

1.Over medium high heat on the BBQ/grill, or on a grill pan or regular fry pan, cook  haloumi pieces in a bit of oil until golden brown on both sides (if doing this directly on the BBQ, just brush haloumi with oil). This only takes a few minutes on either side.

2. Combine remaining salad ingredients with dressing,  lay haloumi pieces on top and drizzle with a bit of extra dressing. Simple as that. Enjoy!

Melbourne is Immune to Global Warming: Sesame Zoodles

Photography by Kim Mennen Styling by Ali Nardi

Photography by Kim Mennen, Styling by Ali Nardi

It’s obvious at this point that Melbourne doesn’t feel like giving its people a break. We love you Melbourne, but you don’t seem to love us back. It’s spring, and you are still throwing weather tantrums. It’s immature, and inconsiderate and I expect it to stop. Everyone is cranky and depressed, and I’m hitting that point too. Luckily, because we aren’t in NYC, no one is calling it, “weather prone depression,” but really we all have a touch of it. So cut it out. It’s just plain rude.

I’ve gone ahead and made something springy anyway. I’m sick of slow cooking, and roasts. I don’t want to play with my oven tonight. I want to embrace the fresh veg of spring– gosh, I don’t even know what spring means anymore. What-eh-ver.

I was skeptical about zucchini noodles–a.k.a.”zoodles”– for a long time. While on a somewhat Paleo stint I scoffed at the idea. I LOVE pasta. It is hands down one of my favorite foods ever. I wasn’t about to disgrace pasta by trying to recreate it with a zucchini. I was just going to have it once as a while, not as a a small treat, because I’m incapable of eating small portions of pasta. (I allow myself an occasional pasta binge.)

Then someone I knew got hold of a “zoodler” and I became a believer. This little gadget is simple, but efficient, and the zucchini comes out in a very satisfying spaghetti cut. It isn’t spaghetti, but it isn’t so far off, and you could just think of it as a totally different food that happens to go well with pasta/noodle sauces. I’m pretty into them, and have to make them often to justify spending nearly $40 on a piece of plastic.  I keep them raw when using them so the flavor is more neutral. If you sautee them, you will end up with a stronger zucchini flavor, but that will work for some dishes. It all depends on personal taste.

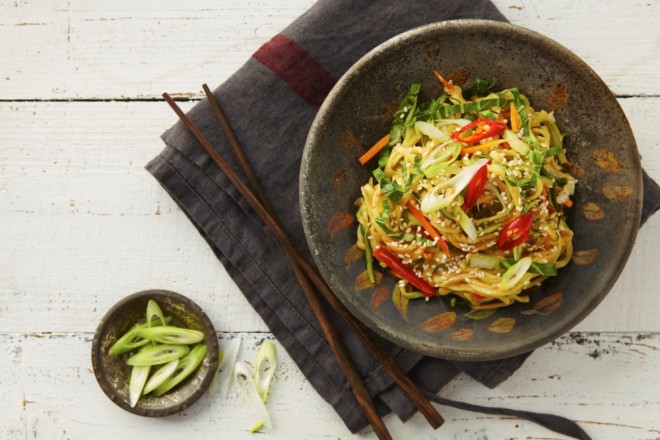
So here it is: Sesame Zoodles. This recipe, adapted from Zygot Bookworks & Cafe originally published in Bon Appetit Magazine,  is a veggie-packed, no-cook recipe that absolutely reeks of spring. It’s misses a lot of sore spots as it’s dairy free, free from processed sugars (you’ll need to purchase “no-sugar added”/ all natural peanut butter if you are avoiding sugar), gluten free, vegan and raw, but still tastes really good… Take that Melbourne!

zoodles 3

I’ve been making this for years using udon noodles, and now I use zoodles with it. You can really add whatever veggies you like. With the sauce, some people prefer it more peanut buttery or thicker/thinner so feel free to play around with the soy sauce, vinegar and stock, but these ratios are what I like.

If we pretend it’s warm, maybe it will actually become warm…

Sesame Zoodles (adapted from Zygot Bookworks & Cafe)

Ingredients:

  • 1/2 cup chunky peanut butter
  • 1/2 cup soy sauce
  • 1 tblspn balsamic vinegar
  • 1/2 cup vegetable broth
  • 2 cloves garlic (or more), finely chopped
  • finely chopped red chilli to taste (optional)
  • 3 spring onions/scallions thinly sliced plus extra for garnish
  • 2 cups shredded nappa cabage
  • 1 head bok choy, well rinsed and thinly sliced
  • 1 red or yellow bell pepper, thinly sliced
  • 1 carrot, julienned
  • melted coconut oil or oil of choice to coat zoodles
  • 2 tblspn sesame seeds plus extra for garnish
  • about 3/4 zucchini per person to be made into zoodles–this recipe makes enough for 3 or 4 people.

1. To make the sauce, combine the first 5 ingredients, as well as the chilli if using. Make your zoodles and coat with a little bit of oil in  a large bowl. Add remaining vegetables and coat with sauce. Add sesame seeds. Garnish with extra sesame seeds and spring onions

Mom’s Artichokes, Flannel and Boomboxes

Artichokes 2 AsiaPhotography by Asia Upward, Styling by Ali Nardi

First, a shout out to my buddy Asia Upward, who is so much fun to work with (plus I love her dog, Bear). She really knows how to photograph food and she has done some really lovely work for this blog. To see more of her work check out her website: Porkchop Photography

Whilst wandering through the Victoria Markets last week pretending I wouldn’t make my way to the borek stand and have my customary cheese and spinach borek straight from the oven (and straight from the hands of the borek nazi lady herself, who still doesn’t recognize me after the countless borkes I have purchased–it adds to the experience) I noticed that there were quite a few artichokes about the place, and I got excited and a bit nostalgic.

I love artichokes, and I really enjoyed eating them when I was a kid and my mom used to make them. They are in season in Victoria, and naturally that meant I would be eating them soon. By that, I mean I naturally expected them to be prepared for me soon–by my mom. And then it hit me. I have never cooked an artichoke! Okay, there might have been that one time in Italy after the artichoke fair in Rome, but did I actually prepare the bundle of chokes we brought back, or did I just sip 3 euro wine and sit on the windowsill watching my friend prepare them before eating them?

In any case, it was due time, cause mom is all the way back in Brooklyn and who else is going to make me artichokes? I wanted to make them the same way she always did when we were kids: simple, delicious–when you pull the leaves off and tear off the meaty bottoms with your teeth, then scoop the choke from the heart and eat the heart and a bit of the stem. So I called her, and she gave me the rundown, which I have passed on here.

After Asia Upward photographed the artichokes, we ate them, and Asia had a rush of nostalgia, cause sure enough, her mom used to make them the same way. And that’s when we realized artichokes are totally a 90’s thing. Perhaps they aren’t instantly recognizable as 90’s trend– the boombox, flannel, Pearl Jam–but that’s the decade they brought us back to.

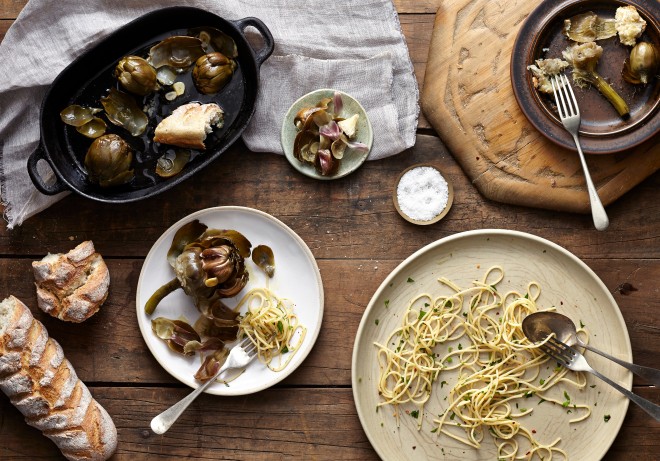
So go grab some Artichokes at the market and and enjoy a blast to the past, and maybe plan to watch an episode of My So Called Life after dinner. I would portion two artichokes per person as part of a bigger meal. I served it up with a simple spaghetti with a bit of chilli flakes, parsley, and parmesan, and some bread to soak up the garlicky artichoke oil.

Artichokes 3 Asia

Mom’s Artichokes

Ingredients:

  • Artichokes (or two per person)
  • 1 or 2 cloves garlic per artichoke, sliced not too thinly
  • salt and pepper to tast
  • olive oil
  • water

Remove the really tough leaves from the artichokes and using a knife, peel the tough skin off of the heart and stem (leave about 2 inches of stem). Gently pull back petals a bit and push garlic slices down in the crevices. Place artichokes in large deepish pan in a single layer. Add equal portions of olive oil and water to the pan until you have about 3/4 an inch of liquid. Place a lid on the pan and bring the liquid to a gentle simmer (if the lid isn’t super snug or has a small airhole, seal the top with a layer of foil and then place the lid on). Allow to simmer for an 1 1/2 to two hours depending on how tough your artichokes are, turning occasionally (be gentle so the leaves don’t fall off). You should able to pierce the heart (right above where the stem meets the choke easily).

Your chokes are done and ready to eat! Just peel the petals off and pull of the tender bit of the pettle off with your teeth. Discard the rest of the pettle (it’s nice to have an extra bowl on the table for discarded leaves). When you get down the the spikey choke, scoop it from the heart, and enjoy the heart and the upper bit of the stem.

Just Beet It! Beets Three Ways

Photography by Clare Plueckhahn, Styling by Ali Nardi

When I met Anders, I was on a diet of beets (“beetroot” over here in Australia, pronounced bee-chroot or these savages won’t understand you…) with a few other flares, like arugula, parmesan, and balsamic vinegar. I was obsessed and it was the only thing I craved. I looked forward to waking up to eat beets for breakfast, packed some for lunch, and finished my day with a nice beet dinner– before I went out wandering the streets of Rome with a Peroni and cigarette in tow… (meanwhile, I am still recovering from two glasses of champagne Saturday night and it is already Monday afternoon…. I miss youth!).

Photography by Jesse Hisco

Looking back, it was pretty weird and a little gross, but something we still joke of fondly as the “beet-phase” when we make them. Since those days, my addiction to both beets and cigarettes have subsided, but I still eat beets in moderation, and not always in that same old salad. They are also just a gorgeous veg, and I get them into photos whenever I have the chance.

At the green markets you can sometimes find gorgeous candy striper (chioggia beets), yellow and white beets. They are great just grated up raw into a salad, in fresh juice,

Or you can put a bit more time into to make something extra special and use them in my following three recipes: Beetroot Pizza with Balsamic Reduction (pictured above), Winter Veg Salad with Pear and Blue Cheese (pictured above), and My Spiced Pickled Beets (sorry, no photo). Enjoy!

Beetroot Pizza with Balsamic Reduction

Recipe by: Ali Nardi

Ingredients:

  • 1 x pizza base (if you’d like to make your own, see recipe for  Whole Wheat Pizza Dough here)
  • About 3/4 lb raw beets (any kind you like), scrubbed and trimmed
  • A few tbspn Reduced Balsamic Vinegar (can purchase or make at home)
  • 1/4 red onion, thinly sliced
  • fresh parsley
  • shaved parmesan cheese
  • Olive oil
  • salt and black pepper
  1. Preheat oven to 400 °F
  2. Place beets on foil on a baking tray and drizzle with olive oil. Add some good salt and black pepper and close the foil to make a parcel. Roast in oven until you feel just a bit of resistance when you insert a paring knife into the beets (time will vary on size of beets but can take anywhere from 20 mins to an hour depending on their size).
  3. Allow beets to cool and set oven to highest possible temp. Peel beets and slice into 1/4 inch thick rounds
  4. Brush pizza base with olive oil. Layer beets onto base, brush with oil. and sprinkle with a bit of black pepper and salt. Bake until pizza is ready (about 12 minutes in my oven).
  5. To your taste: Scatter fresh parsley leaves and parmesan shavings over top of pizza. Drizzle with a bit of Olive oil and Balsamic reduction and serve immediately

Winter Veg Salad with Pear and Blue Cheese (Serves 2)

Recipe by: Ali Nardi

This salad is really about what you feel like putting in it, but I will give some guidelines. This is a very hearty salad and would be a great vegetarian main

Ingredients:

  • 6 baby beetroot, scrubbed and trimmed, and halved lengthwise (leave a bit of the green on)
  • 1 medium sweet potato, cut about 1/3 inch thick or however you like
  • 2 small parsnips, cut into horizontally into 2 inch pieces (quarter the thicker pieces at the root end)
  • 1 carrot, shaved into ribbons with a veggie peeler (I used purple and yellow carrot in the photo above)
  • 1 pear, thinly sliced
  • thinly sliced red onion
  • a few handfuls arugula (rocket)
  • about 1/4 cup crumbled blue cheese
  • salt and pepper
  • Olive oil and balsamic reduction to dress (or just regular balsamic vinegar)
  1. Preheat oven to 400 °F
  2. Place beetroot on a baking tray, and sweet potato and parsnip on a separate baking tray. Dress veggies on both trays with olive, salt, and pepper, and roast until tender: about 20 mins, moving veggies around on once or twice.
  3. This salad can be plated really beautifully on individual plates, or you can just toss it all in a bowl and treat it like any other salad. In any case, arrange the veggies, pear, rocket and blue cheese how you like, and dress with olive oil and balsamic reduction. Sprinkle with freshly ground black pepper.

My Spiced Picked Beets

Recipe by : Ali Nardi

These are so good in a green salad, or on bruschetta with ricotta, feta, or creamcheese, or chopped up in a grain salad.

Ingredients:

  • 1 cup red wine vinegar
  • 1/2 cup red wine
  • 1 cup honey or sugar
  • 2 star anise
  • 1 cinnamon stick
  • 3 cloves
  • 2 medium sized beets, peeled cut in half, and sliced about an 1/8 inch thick

In a pot big enough to hold all ingredients, add everything but the beets. Cook over a low heat until the sugar/honey is completely dissolved, and then bring to a gentle simmer. Cover and allow to simmer for 5 minutes. Add beet slices, and bring to a boil. Turn off and allow to cool completely before removing spices and transferring to a container. Allow to sit for a week in the fridge before using. These will last a long time, and just get better with time.

Unemployed? Have a Cookie

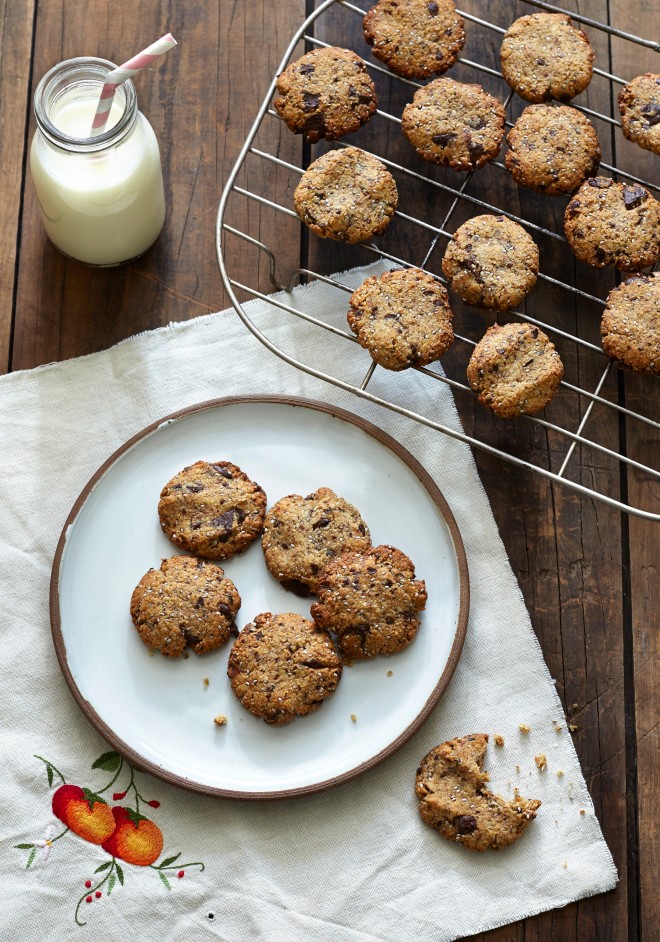
cookies 4Photography by Asia Upward, Styling by Ali Nardi

My housemate really likes ice cream. We have a freezer full of it. Sure, it’s his ice cream, but it’s right there, and it’s not just one brand and one flavor. It’s a whole selection. Damn you Tom!

I repeat, it’s his ice cream. But like I said, there was so much of it, and right there! I cracked the other night and stole far more than a modest scoop. Then I felt like the horrible housemate who steals food, and excessively apologized the next morning. I started with, “I did something bad,” which is up there with “Can we talk,” as a phrase that fuels anxiety. It was a poor sentence to start with. I could see the color drain from his face and feel those unpleasant butterflies fluttering around in his ice cream coated belly. He was thoroughly relieved when he realized I was just talking about ice cream.

I’m unemployed. It’s a state of being that I personally find really challenging, especially after leaving a perfectly good job. But, I simply had to move to Melbourne, and I don’t regret that. And starting over is kind of habit of mine, except for the past almost three years, instead of flying solo I’ve got a start over buddy whose beard looks like haven for birds at the moment (it suits Melbourne though).

There is of course the honeymoon period, where everything is new and exciting, and honestly, my interest in Melbourne hasn’t worn off in the slightest, and I am genuinely thrilled to be here. There is just the fact that I will eventually need an income if I want to stay, and I definitely want to stay.

So now just simply isn’t the time to go cold turkey on sweets, or I could end up dipping into something much worse as the psychological effects of starting over yet again and being unemployed slowly but steadily chip away at my self-esteem.

I know, it’s not to the most interesting or dramatic vice, but god forbid I revert back to my smoking days. I lost track of how many times I had to quit to truly kick my addiction to those delicious cancer sticks, and for the past few years it has been breezy. I have maybe two a year just for the nostalgia factor, and the next day I feel hung over and shitty.  I couldn’t go back if I tried. My body won’t let me, not to mention Anders would hound me the same way I hound him about eating bacon EVERYDAY. And I am grateful for that (not the bacon part, just the rest).

Yeah, being unemployed can suck, and that’s nothing new. Depending on where you are in your life and what your goals are, it can be a good experience too, if you can motivate to go do some cool things with your new-found free-time that don’t cost anything. Currently I am working on building defensive forces against the negatives of unemployment by constantly distracting myself with projects.

But the negativity still managed to slip in. In fact, I feel like I cause a lot of my own grief over not having a job.

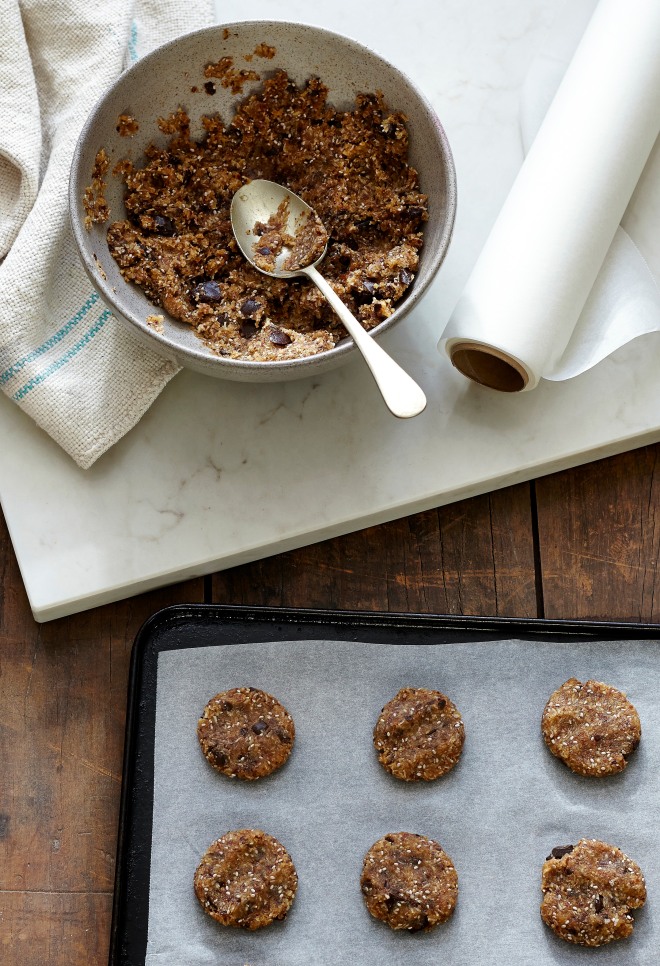
choc chip cookies 2 asia

For example: I feel rejected even when I’m not applying for jobs! This is the most ridiculous contradiction I experience. Even if I am actively NOT looking for a job, I still feel like no one wants to hire me. What? That one just makes me angry at myself, and it is probably annoying to read. You might be thinking I need a good slap and a shake. I don’t blame you.

Another thing: Being unemployed is an excellent conversation killer, but I could easily eradicate this problem by simply lying. When people ask you, “What do you do?” meaning “what do you do for a living?” and not what do you do in your spare time for fun (unless you are in San Francisco, where it actually means, “what do you do that makes you happy”), they often get uncomfortable when you can’t provide them with an answer. If you are speaking to a gainfully employed individual, chances are you are making them feel like unemployment is contagious, and they must exit the conversation post-haste to save their own pay check. So instead of saying, “Oh, I’m currently looking for a job….” or “Yeah, things are a bit slow right now….” I could be saying I teach Norwegian lions how to speak Spanish, or even better, I could say I am an Internal Project Manager Analayst Engineering Consultant. I guarantee no one will actually ask me details about that one.

Choc chip cookies

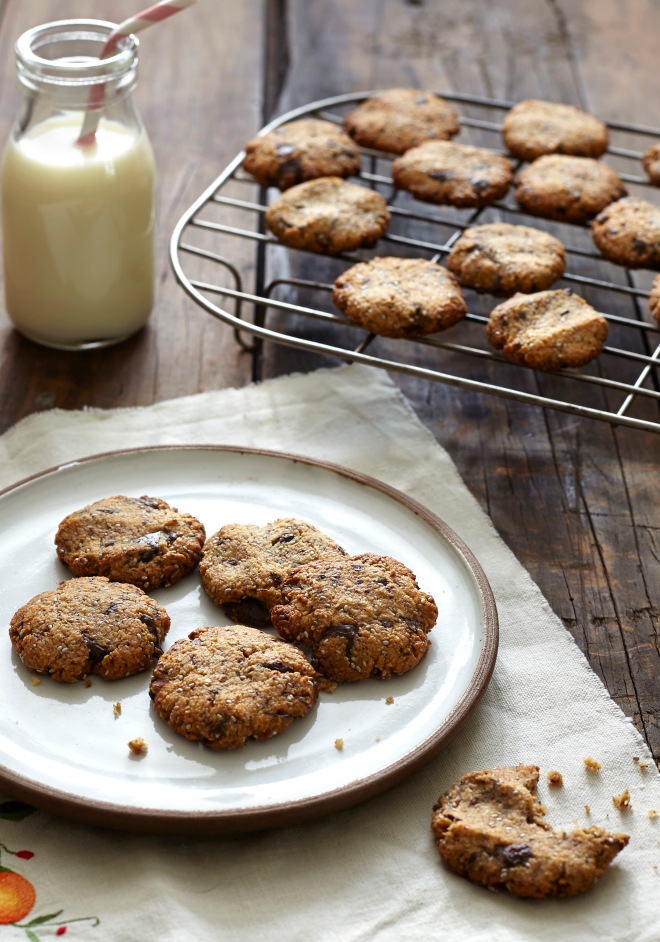
To cope with the “U” word, and that fact that I am back to having one friend within over 500 miles (shit that’s far, and true!–Anders alone has to act as my BFF, boyfriend, personal butler, and therapist all at once) , and so I don’t attempt to overcome the challenge of un-quitting smoking,  I indulge in sweets and watch The Biggest Loser in moments when I feel like throwing in the towel. Those are the bits I am willing to share with you at least. But I like to think I am being clever about it. I’ve been steadily baking sweets that aren’t going to harm me too much, and might actually help me on both the nutritional and psychological front. And ultimately, they prevent me from pilfering Tom’s ice cream.

choc chip cookies 3 asia

I do this by cutting out the flour (my usual MO) and adding some extra nutritional bits in there. There is a flourless chocolate chip cookie recipe from The Sprouted Kitchen: A Tastier Take on Whole Foods by Sara Forte with lovely photos by Hugh Forte that I  keep coming back to. (They also have a blog by the same name with loads of recipes.) It uses almond flour and is so easy and delicious, and it ain’t that bad for me (so I let myself have way to many which bring me back to square one). It is without a doubt my favorite flourless recipe so far, and one of my favorite recipes in general. I have adapted it just slightly by adding espresso and chia seeds for flavor and texture and to keep my energy levels up.

Chocolate Chip Chia Espresso Cookies

Adapted from: The Sprouted Kitchen: A Tastier Take on Whole Foods

Yields 22 cookies

Ingredients:

  • 1 ¼ cups almond meal
  • ½ cup unsweetened shredded coconut
  • ½ tsp baking powder
  • ¼ teaspoon salt
  • 1 ½ tsp espresso powder
  • ¼ cup chopped dark chocolate
  • ⅓ cup packed brown sugar
  • 1 tblspn chia seeds (optional)
  • 1 large egg
  • 3 tbsp unsalted butter or coconut oil (or oil of choice), melted
  • ½ tsp vanilla extract
  1. Preheat over to 375 F/ 190 C
  2. Mix first 7 ingredients in a bowl as well as chia seeds if using.
  3. Beat egg until doubled in volume and foamy. Whisk in butter and vanilla (make sure butter has cooled so it doesn’t cook the egg!)
  4. Mix wet ingredients into dry and allow to stand for 10 minutes
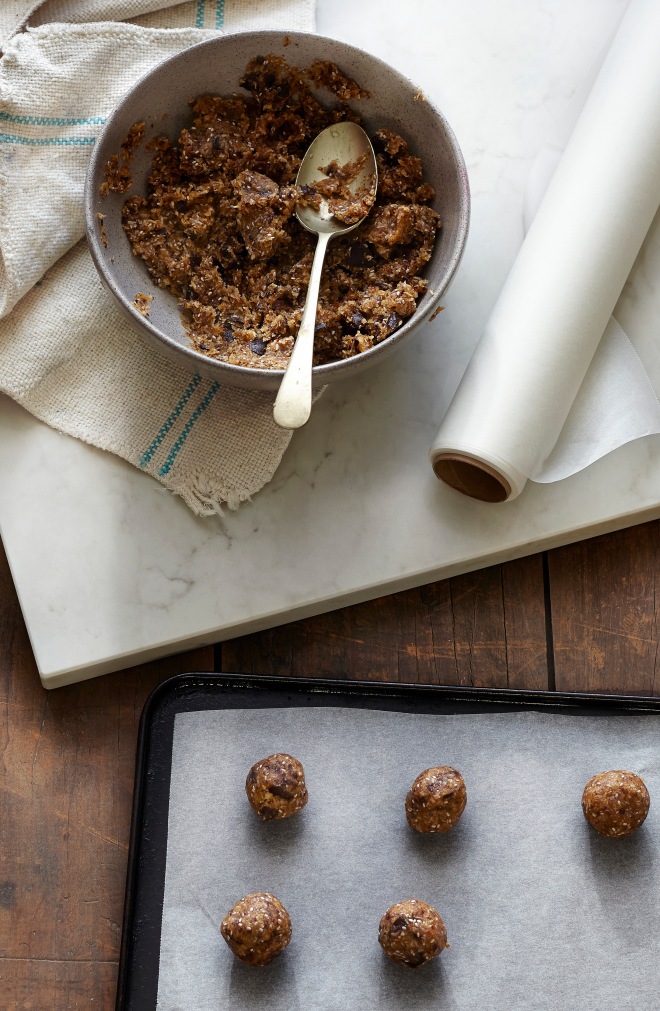
  5. Wet hands, and roll dough into balls the size of a large marble (about 1 tblspn dough per cookie). Place dough onto ungreased baking tray and flatten dough balls with palm.  Bake for 7- 10 mins. (Almond meal tends to brown fairly quickly, so it’s best to make these small so you don’t end up with a burnt outside and undercooked inside)

The Jew-Factor: Just Follow the Matzo Crumbs… Passover Carrot Cake

Photography by Asia Upward, Styling by Ali Nardi

Except there are no matzo crumbs.

Being a Jew in Australia is both comical, and a little difficult to swing.

Here’s an example of the comical: Many Aussies assume that because I am Jewish, I am an expert on the Jewish religion– even though I am more of a Jew by heritage if you catch my drift. A friend wrote Anders an email when she returned from a trip to NYC: “While we were in New York, there were all these Jewish people dressed in traditional clothing going into these makeshift rectangle rooms. I think they were celebrating something? And the young boys were going around asking people if they were Jewish. Does Ali know what they were celebrating???”

The Difficulties: It’s not that I feel unwelcome or anything. It’s just that there isn’t really much of anything Jewish going on if you are a “casual Jew” like myself (something like a half-blood from Harry Potter, who grew up celebrating all Catholic and Jewish Holidays but never really tied any religious significance to either). So it’s hard to keep up with Passover, Yom Kippur, Chanukah. It’s also difficult to find egg noodles to make kugel with, and this is the real tragedy of it for me.

Being a Jew has always been a bit like wearing an accessory in my case–something I identify with to a certain extent and enjoy having as an extra flourish, but not something that I defined myself by…. until that is, I started living abroad and until I met Anders. In New York I am one of many who get called out while in the NYC subway: “Are you Jooeesh?” Here, it’s more of a novelty, because I am the only Jew most of my Aussie friends have ever encountered, or rather, known personally. And whether or not I chose to tell people doesn’t make a difference, as Anders has made it a well-known fact. It’s cute… sort of.  I didn’t understand how widespread the word was until people were leaving bacon just off of my plate (I do not keep kosher for the record). My favorite bit though is when Anders told his father I was Jewish before his father met me, and he said “Well don’t hold it against her!”

But like I said, no one I know has an issue with it. For the most part, they just didn’t grow up with it as part of their lives. During December holidays in Brisbane, there was no such thing as saying “Happy Holidays!” It’s just, “Merry Christmas!”

Bottom line: it’s good that people have a curiosity to know what it’s all about. I just wish I knew so I could tell them!

I feel like I should participate a bit in this inherited culture though, even without mom and dad and the olds here to organize Passover. I gotta represent! So this year, I have decided to do a mini Seder on the second night of Passover (tomorrow). In Brisbane, finding Passover products just wasn’t happening. But now we are in Melbourne, where the possibilities are endless (and the laksa is amazing!). Sure enough, there is Carlisle St. in Saint Kilda, an area that feels a lot like Brighton Beach in Brooklyn, about 45 minutes away from me via bike. So I took my wheels on an adventure yesterday, and got the necessary bits for passover. Matzo meal to make matzo balls, matzo bread (this is also nice to have in the house to snack on), and red horseradish (my favorite). The rest I can find at Vic markets tomorrow.

I also made a Passover Carrot Cake (flourless) that we can enjoy at the mini Seder and throughout the week, because I like having something sweet around that is nutritious enough to eat as a meal. I’m not a big fan of chocolate, and the typical flourless chocolate cakes at passover are too sweet and heavy for my taste, but I love a good carrot cake.

I’ve adapted this recipe from Elana’s Pantry. I’ve spiced it differently, added dried figs, and since I originally posted this, I have altered the frosting, as her cream cheese frosting didn’t really do it for me and can now give you an awesome cream cheese frosting recipe! Also, I simply don’t use gave in my food.

Instead of doing a two-layer cake, I do a one layer cake, and then make the rest into cupcakes, or do them all as cupcakes as a sweet snack to have during the  week– no frosting when going for the snack idea! (You might notice two are missing in the photo. Photographer Asia Upwards dog Bear got to them when we turned our backs for a second!)

Note: This cake is flourless (almond-meal), and can also be made dairy free by swapping out the melted butter with your oil of choice (I recommend coconut oil, or the original recipe calls for grape seed oil).

carrot cake 2 Asia

Flourless Carrot Cake with Cream Cheese Frosting

Adapted from Elana’s Pantry

  • 3 cups blanched almond flour (DO NOT use Bob’s Red Mill. It is too coarse)
  • 2 teaspoons salt
  • 1 teaspoon baking soda
  • 2 tsp cinnamon
  • 1 tsp ground ginger
  • 1 teaspoon nutmeg
  • 5 eggs
  • ½ cup honey or agave nectar
  • ¼ cup melted butter
  • 3 cups grated carrot
  • 1/2 cup raisans
  • 1/2 cup chopped dried figs
  • 1 cup walnuts (plus a few extra for decoration)

Frosting

  • 1 cup creamcheese (about 250 grams)
  • 2/3 cup heavy cream
  • 1 stick (115 grams) butter, softened
  • 1/4 cup honey
  1. Preheat oven to 325F. Grease two 9 inch cake tins, and line the bottom with parchment paper. Grease the parchment paper.
  2. Mix dry ingredients in a bowl, using your fingers to break up any clumps of almond meal.
  3. In a seperate bowl, mix together eggs, honey and melted butter. Stir in carrots, raisans, figs, and walnuts.
  4. Mix wet ingredients into dry, and divide batter evenly into cake pans.
  5. Bake for 35 to 40 minutes. If the top starts to brown too quickly, cover with foil. Allow to cool before removing from cake pans.
  6. For the frosting: With an electric beater, beat cream cheese until smooth in a  medium bowl. Add butter and honey and beat until smooth and fluffy. In a separate bowl, beat cream until you have a nice thick whipped cream (don’t let it go to butter!). Combine with cream cheese mixture. Store in Fridge for up to a week, and store in freezer after that. To revive it, just beat it til smooth again.

The Pros and Cons of Shared Housing: Persimmon and Brandy Chutney

DSC_0463W are finally in Melbourne, and I’m simply loving it. Some places you feel a connection with. Others, you don’t. For me, Melbourne is one of those cities where that clique happens, at least this time around. When visiting in the past, I didn’t necessarily feel that connection, but now that I am settling in for a good stay, I have opened up to the city and in turn Melbourne has sent its love back. Currently, that love is in the form of a 5 kilo round of pecorino cheese my lovely new housemate Tom brought home from work. Ah, cheese, the way to my heart.

Yes, you read correctly–we have a housemate. Actually, we have two housemates. I had assumed that after making the transition to living with just my boyfriend we would continue living just us. This expectation was swiftly squashed however, when we realized Melbourne ain’t cheap, and we are still keen to continue traveling (a hobby which can burn a whole into the pockets ril fast). And so, for those trips to happen, and really so we have extra cash for eating all of the amazing food in Melbourne, we are back to housemates.

The cons of having roommates are obvious, the main inconvenience in my opinion being the unspoken agreement that it isn’t cool to walk around the house naked. But some of my closest friends today were originally just strangers who I shared the same toilet with. I’ve never been comfortable with the idea of living with someone else and just sharing a utility bill. Why would you want to live with someone you don’t even want to know? How would you trust them not to dunk your toothbrush into the toilet? Even if you aren’t walking around naked, chances are, one of your housemates is going to spot your wobbly bits at some point, and better you know that person likes you and won’t be inclined to snap it and put it on Facebook.

Sure, we have all had our bad experiences with roomies–i.e. Being locked out at 3am cause they bolted the door and passed out, coming home to find a housemate’s friend’s asleep in your bed, and of course, the forever dirty fry pan, a situation which John Birmingham explores in depth in his book He Died with a Felafel in his Hand. Yup, Mr. Birmingham did indeed come home to find a flatemate who had died while in the process of consuming a felafel.

The examples given above are pretty run of the mill (except the one about the dead guy)– annoying but not life threatening. They can over time build into a frustration that might translate into small doses of insanity if you live with, say, a neurotic New Yorker by the name of Ali, but there won’t be any blood shed (scrap that–a guy was locked up in Australia recently for killing his housemate because he kept leaving the bathroom dirty). Anyway, if you can get past the inevitable annoyances, and realize you yourself do just as many things that rub your housemates the wrong way, having housemates isn’t so bad.

DSC_0454

Apart from landing some pretty chill housemates, we also live a walk away from the amazing Queen Victoria Markets, possibly the largest and oldest market in the Southern Hemisphere. We have only be here two weeks and I have easily been 6 times, and eaten at least that many spinach and cheese boureks while wandering the premises. From the deli section, to the meat and fish section, to produce, to prepared foods and an awesome night market in the summer, this is my favorite place to spend time so far in my new city. If you make it to this year’s last Suzuki Night Market next Wednesday (March 27th) I highly recommend the Mr. Calamaro stand. I had the “Bocadill0”– amazingly light calamari on a roll with aioli and a piquillo pepper. Yum!

Lisa's Appled BrandyBottled Dec 2012

Lisa’s Appled Brandy
Bottled Dec 2012

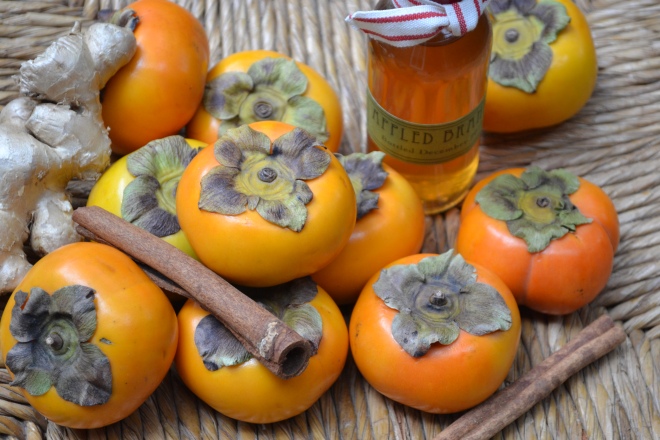
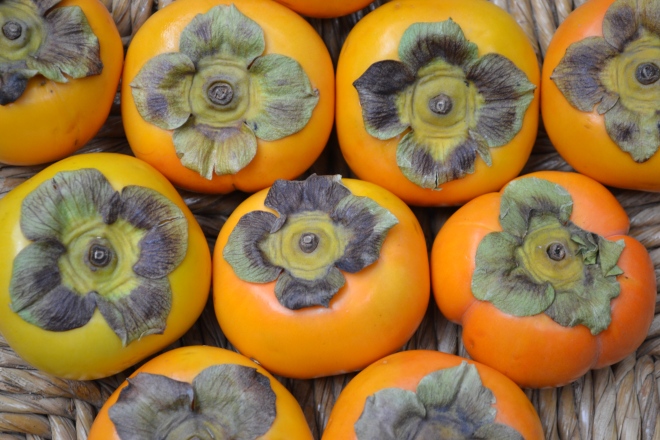
Vic Markets is a great place to get seasonal veg, and persimmons are in right now. With fuyu persimmons and some delicious apple brandy that my friend Lisa “appled” herself and bottled in style (but that I am too wimpy to drink straight), I made a persimmon and brandy chutney adapted from a recipe in Saveur Magazine by Marisa McClellan, author of  Food in Jars: Preserving in Small Batches Year-Round. I’m not a big fan of super sweet chutney, so I have cut down on the sugar, and added brandy and some spiciness. It tastes good right off the stove, but I prefer my chutney after it has sat on the shelf for a few months so the flavors can mesh and the acid can mellow.

What’s your favorite foodie spot in Melbourne?

DSC_0483

Persimmon and Brandy Chutney

Recipe by: Alexandra Nardi (adapted from: Marisa McClellan’s recipe in Saveur Magazine)

Ingredients:

  • 3 x 270 ml jars/ half pint jars and lids
  • 2 tsp yellow mustard seeds
  • 1/4 tsp fennel seeds
  • 2 tsp coriander seeds
  • 3 green cardamom pods, crushed
  • 3 cloves
  • 3-inch piece cassia bark or cinnamon stick
  • 2 1/2 pounds (1100 grams) persimmons, chopped
  • 1/2 pound (200 grams) apple, chopped
  • 1 medium yellow onion, chopped
  • 1/3 cup raisins
  • 1 fresh red chilli, finely chopped
  • 1 inch piece ginger, finely chopped
  • 1/3 cup brandy
  • 2/3 cup apple cider vinegar
  • 1/3 cup H2O
  • 1/3 cup brown sugar
  • 2 strips lemon zest
  • 2 tbsp lemon juice
  • salt to taste
  1. Wash and sterilize jars and lids.
  2. In a large pot (large enough to fit all ingredients), toast mustard seeds, fennel seeds, coriander, and cardamom pods over medium heat. When the mustard seeds begin to jump, add remaining ingredients. Bring to a boil and reduce to a simmer. Simmer for about 1 1/2 hours, or until you have the chutney texture where you want it, stirring occasionally to prevent the bottom from burning. Remove cassia bark and lemon zest strips.
  3. Transfer chutney to jars, leaving 1/4 to 1/3 inch space at top of jars and process in boiling water bath for 15 minutes.

Possum Wars and Indian-Style BBQ

Indian Spiced Lamb Chops with Tamarind

Indian Spiced Lamb Chops with Tamarind

I’m in the middle of moving (arrgggg) but I won’t bore you with that. Hearing about the ups and downs of someone’s move is just about as interesting as hearing stories about airport delays or how your cat really is the cutest cat ever (impossible, because mine are)…. But, made some rad food for a farewell barbecue, and got the thumbs up from my guests to post my Indian barbecue recipes to the blog (not authentic Indian food, just some stuff I made up). These recipes are great on the barbie in summer, but could also be moved from the barbecue to the oven for a hearty winter m. They were a hit, thank goodness. Wouldn’t want to leave on anything but a tasty note!

The Barbecue: Anders and I had a “farewell barbecue” to see our friends before we head south. Everyone got along great, except for our resident possums, who were duking it out.  The neighbors recently cut down some well established trees and the possums that used to dwell in that territory are now trying to move in on the possums living in the branches above our roof. Possums are anything but stealthy, and we could hear them tumbling around overhead. Pictured below is a possum that couldn’t hold it’s ground and joined our barbecue for a while. Unlike those fangy looking, pink-eyed possums in the US, possums in Australia are adorable, except for when they are in your kitchen nibbling on leftover salad, and refuse to budge even when you are waving your arms like a mad man and shouting at them.

Just want to say the friends I have made in Brisbane are fantastic people, and I will miss you (but we’ll be all up in your face when Anders and I are back to visit family). Take care and enjoy the recipes!

DSC_0339

Indian Spiced Lamb Chops with Tamarind
Recipe by: Alexandra Nardi

Ingredients:

  • 1 tsp coriander seeds
  • 1 tsp cumin seeds
  • 1 tsp fennel seeds
  • 1 tsp paprika
  • 3/4 tsp salt
  • 4 cloves garlic, minced
  • 1 inch piece ginger, finely chopped
  • 2 1/2  teaspoons tamarind paste*
  • 1 tblspn honey
  • 2 tsp melted coconut oil (or oil of choice)
  • 6 lamb chops (from the shoulder, a few more if you are using lamb loin chops)
  • 1 lime (optional)
  • Raita to serve (recipe follows)

Raita Ingredients:

  • 3/4 grated cucumber
  • salt to taste
  • 2 cups Greek yogurt
  • good handful of fresh mint, chopped (plus a sprig for garnish)

*You can find tamarind paste in Indian/Asian grocers

  1. Grind coriander, cumin, and fennel seeds in mortar and pestle until the seeds are broken down (but not yet a powder). Transfer to a bowl, and add paprika, salt, garlic, ginger, tamarind paste, honey, and oil. Add lamb chops and toss well to coat. Cover bowl and marinate in the fridge for at least 2 hours and up to 8 hours.
  2. Heat grill (barbeque) to high, and cook lamb chops a few minutes on each side (I like them medium rare, so about 2 to 3 minutes on each side. Cook a few minutes longer on each side for medium or well done).
  3. Squeeze lime juice over lamb chops and serve with raita.
  4. For raita: Grate cucumber and sprinkle with a bit of salt. Allow to rest for a few minutes than squeeze out and discard excess liquid. Mix cucumber and mint into yogurt. Add salt to taste. Garnish with a sprig of mint

Indian Spiced Yogurt Chicken

Recipe by: Alexandra Nardi

Indian Yogurt Chicken

Indian Spiced Yogurt Chicken

Ingredients

  • 1 tsp cumin seeds
  • 1 tsp coriander seeds
  • 1 tsp mustard seeds
  • 1 tsp turmeric powder
  • 1 tsp salt
  • 1/4 tsp chilli flakes, more if you like it spicy
  • 1 tsp Garam Masala (see recipe below)*
  • 1/2 cup chopped cilantro (fresh coriander), including stems, and a few sprigs for garnish
  • thumb size piece ginger, finely chopped
  • 5 cloves garlic, minced
  • 3/4 cup plain yogurt (I use Greek yogurt)
  • 1 whole chicken, cut into 6 or 8 pieces
  1. Grind cumin, coriander, and mustard seeds in a mortar and pestle until broken down (but not into a powder). Pour into a medium bowl and add turmeric, salt, chili flakes, garam masala, cilantro, garlic and ginger. Add yogurt and stir to combine. Add chicken pieces and coat with yogurt mixture. Cover and allow to marinate in the fridge for at least 1 hour and up to four.
  2. Heat the grill (barbeque) to medium heat. Cook chicken for about 20-25 minutes, turning over once (wings and drumsticks will cook faster than the breast and thigh pieces).  Garnish with cilantro sprigs and serve.

*You can of course buy garam masala, which is a blend of different spices in powder form. I like to make my own, as I have found that it really makes a difference if you use fresh spices. So, if i plan to cook with garam masala, I make the garam masala myself and keep it in a jar, where it stays potent for a few months. I use one of the garam masala recipes from Indian Vegetarian Cookery, by Jack Santa Maria. This no frills book (no pictures!) is a really good book to use as a launch into cooking Indian food, and it has been a great learning tool for me.

Garam Masala (by Jack Santa Maria)

To make your garam masala, in a mortar and pestle grind together:

  • 4 parts black peppercorns
  • 4 parts coriander seed
  • 3 parts cumin seed or fennel seed (i just do both)
  • 1 part cloves
  • 1 part cardamom seeds (just crush the pod to release the seeds)
  • 1 part cinnamon

Hipster Gripe: Grilled Eggplant and Tomato Salad with Balsamic Syrup

DSC_0267 While winter is hitting hard back in the US with a massive snowstorm included, summer will be over in a  few weeks in Australia, and because we are off to Melbourne on the 1st of March (now that a date is set it’s the real thing!), that means it is actually going to get cold (Yay!)  And we get to do cold people things, like…being depressed and miserable. As a New Yorker, I am entitled to claim weather prone depression as a condition!

Cold weather and creativity generally go hand in hand, as there are no beautiful beaches to frolic along, or tropical fruits to binge on. You have to make your own fun. I’m going to need a creative boost so hopefully I absorb those creative craft brew winter vibes through what will be my terribly pasty white skin and chapped lips, as I am hoping to start my own little food business (key word “hoping”). The food scene in Melbourne is awesome, and people are into it, and that makes me happy.

People also seem to be into pirates and mustaches, which sort of makes me feel like I am moving to Williamsburg in Brooklyn, which scares me a bit, as I can’t seem to walk through that neighborhood without experiencing some sort of hostile encounter. But all of the young people in Melbourne wearing granny clothing and riding vintage bikes that I spoke to were actually really nice and genuine, so I think they are an evolved brand of hipster down there that knows how to smile and say please. Not the type you have to have a brawl with at Fette Sau BBQ joint in Williamsburg to get a chair (thanks for protecting me Sikorski!) And let’s be honest– Anders wears wayfarers, tight jeans, and sports a big ol’ beard when he isn’t doing the Aussie board short and shirtless look, so I am dating a hybrid hipster anyway. He will be my link to their world.

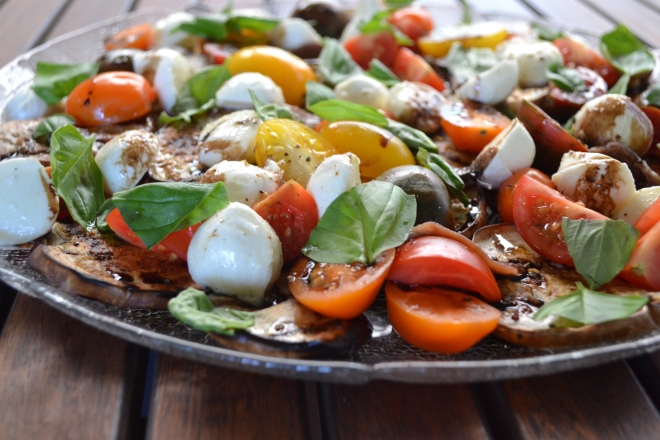
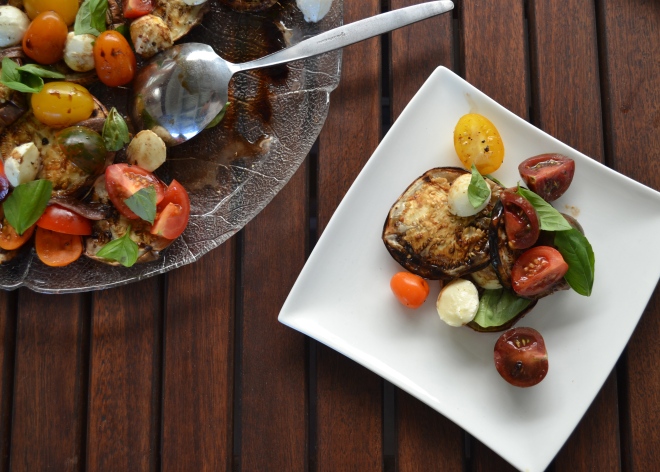
That cold weather means summer salads will be off the table for a while to, so I made a Grilled Eggplant and Cherry Tomato Salad on the barbie to really celebrate the vibrant colors of summer veg and herbs. Produce is so lovely in summer you don’t have to get fancy. I just prepare the veg simply and let it speak for itself.  I know the timing is a bit cruel for those of you back in the states, but perhaps it will help you visualize the warmer days to come, as over the next couple of months, that cold weather feels like it will never end!

DSC_0296

Do you have any hipster friendly summer salads to recommend? I’m going to need to win them over, as hipsters know good food, and they will be my target customer base. Please share!

DSC_0301

Grilled Eggplant and Cherry Tomato Salad with Balsamic Syrup

Recipe by Alexandra Nardi

Ingredients

  • 1 1/2 pounds/ 450 grams eggplant sliced crosswise about 1/2 inch think
  • 3/4 pound/ 350 grams cherry tomatoes (I used a variety of small heirlooms), sliced in half or in quarters for bigger tomatoes
  • 1 cup bocconcini (baby mozzarella), halved or sliced
  • Olive oil
  • 1/2 cup fresh basil leaves
  • 6 anchovy fillets, roughly chopped
  • Salt and black pepper
  • Balsamic Syrup (recipe below)
  1. Several hours ( up to 12 hours) before you are ready to make your salad, line a baking tray with paper towel and lay eggplant slices in a single layer on tray. Sprinkle generously with salt and place in fridge. (Salting the eggplant helps it release water, but if you don’t have time to do this step in advance, it isn’t the end of the world. Just season your eggplant slices with a bit of salt before you throw them on the grill.)
  2. Pre-heat grill (barbecue) to medium. Remove eggplant from fridge and rinse in cold water. Pat dry with a clean dish cloth/ tea towel, or paper towel. Brush olive oil onto both sides of eggplant slices. Place in a single layer on the grill, and cook about 6 minutes on each side, or until eggplant are tender.
  3. Place eggplant, tomatoes, mozzarella, and anchovies on a large platter. Drizzle balsamic syrup over salad to taste, and scatter with basil leaves.

Balsamic Syrup

  • I make balsamic syrup at home cause it is easy and cheap but it takes a bit of time and it makes your kitchen smell like vinegar. If you don’t want to make it, you can usually find it at specialty grocers. Also, in this recipe I give measurements to end up with 2 tablespoons of reduced balsamic which is plenty for this salad, but you can do a whole bottle if you like, as just like vinegar it will keep indefinitely.
  • Place 1/2 cup balsamic vinegar in a small skillet over very low heat, and swirl the pan occasionally. The vinegar shouldn’t be simmering, it should be slowly evaporating. Reduce the half cup vinegar down 1/4 of what you started with (takes about 40 minuted for this quantity but longer for larger quantities). Pour into glass or ceramic bowl or cup and set aside until ready to use. To store long-term, store in a glass jar or bottle  with lid and leave in cupboard.

Apricot Lavender Jam in January? It’s just not right…

DSC_0208

This last month was tough. Even though I had wonderful people to spend the holidays with here, being away from my family and friends in the US over the holiday took it’s toll, and I felt quite homesick. Heading into the New Year of course is always a good time to reset the mind and kind of start fresh, especially after all the stress the holidays tends to bring, but for me, a big part of that reset is the brutal cold of New York that makes you feel hollowed out and ready to rebuild with whatever. So I’m having some technical difficulties resetting in Brisbane, where the weather has pretty much been the same all year : warm and pleasant with occasional rain, a.ka. Florida, and that has been another trigger of homesickness– seasonsickness if you will. Even in “winter,” which spans across what us Americans’ consider summer months: June, July, August– if you are standing in the sun, you don’t need a coat. Anders was able to keep up his “look” throughout the entire year we have been here (yes, it has been over a year!), and by look, I mean shirtless, board shorts, a pair of thongs (also known as flip-flops). Just look at the flowers in the above photo–there are flowers in bloom here people! There should only be barren branches and snow with dog pee in it! Ah the big apple…

I think if you grow up with the seasons, it is something you will always miss when you no longer have them, unless you are an oldie who has upped and moved to Florida to avoid the very idea of seasons. But for me, seasons are like the New Year, an excuse to revamp and start something new. They are refreshing, nostalgic, mini-milestones. So, as I prepare for a journey home to New York for two weeks this month which I am very much looking forward to, I seriously cannot wait to feel like the cold is punching me in the stomach. And it will feel like that, because like the rest of the folk in Brisbane, if the weather dips anywhere below 60F, I find myself bitching and moaning about the freezing weather. Don’t judge! The body acclimatizes quickly!

When January 1st did come, and the day was, as expected, warm, sunny, the same as usual, I needed to do something that felt really productive to kick the year off and distract myself from fantasies of snow and stew. And for me, preserving always feels productive and I get totally in the zone.

DSC_0220

My friends Kylie and Lachlan Scott at the beautiful Flour & Chocolate Patisserie over in Morningside gifted me the book Salt Sugar Smoke by Diana Henry. As the title suggests it is about curing, preserving, pickling etc. It’s a gorgeous book with fantastic photos and even more exciting recipes. I also received some culinary lavender from Victoria State as a gift from Anders’ sister, Ingrid, and it is stone fruit season here in Queensland, so when I saw a recipe for Apricot Lavender Jam in Salt Sugar Smoke, I knew I had found my New Year’s day calling. Also, it is a fairly basic recipe, and as I really don’t have much jam experience, I thought I would start small and branch out to the more complex recipes like her much more involved Pink Grapefruit Marmalade later.

Dried Lavender Blossoms

Dried Lavender Blossoms

Sweating and swatting away mosquitos as I held a thermometer in the jam, I was briefly reminded of the unacceptable warm weather, but was generally able to keep my mind on task. The jam turned out beautifully, with a brilliant taste of apricots you can only get in a homemade jam and a very subtle essence of lavender ( and I have to point out, less sugar and preservatives than the ones I find at the shops, taking it down a notch from your typical equal parts fruit and sugar ratio). In fact, apart from the lingon berry jam at IKEA that is addictive and we eat with Anders’ Swedish meatballs, we rarely buy jam. But now that I have this wonderful book, I plan to stock our shelves with preserves. Homemade jam also makes great little gifts that don’t require a big occasion, and I gave all but one bottle away. For me, sharing the food is a big part of the fun, and people love getting a jar of the homemade stuff.

DSC_0217

I made a point of being well organized and prepared going into this jam mission and I am happy to report it was a therapeutic experience that left me feeling like I started the year on a good note. I think preserving can be a bit intimidating, but if you have everything set up, it is pretty smooth sailing (although my first few experiences with jam were on a whim and I was a flustered mess by the end, and my kitchen didn’t fare much better). You probably already have most of the equipment in your kitchen, and the fussier bits like a sugar thermometer aren’t a must, so don’t panic if you don’t have one.

Oh, and we are moving to Melbourne next month! We don’t have a place to live, or jobs, but by george, we’ll have seasons! In fact, it isn’t uncommon to experience all four seasons in just one day there. It is incredibly erratic and I can’t bloody wait!

Apricot Lavender Jam

Recipe by Diana Henry/ Salt Sugar Smoke

Ingredients:

  • 1 kilo (2.4 lbs.) apricots*
  • 3 sprigs of fresh lavender**
  • 600 grams “jam sugar” (I used CSR brand and it measures out to 2 3/4 cups)
  • juice of one lemon

Equipment:

  • 4 x 225 g (8 oz) jars, or the equivalent
  • wax paper
  • A large heavy pot– preferably something wide. A good rule of thumb is that the jam shouldn’t take up more than 1/3 of the pan
  • Another large pot to sterilize your jars
  • A ladle
  • A sugar thermometer, although if you don’t have one, that’s okay too
  • A small plate

*For the apricots, you want just ripe apricots, or even slightly under-ripe. Fruit contains pectin which is important in the jam thickening process, and when fruit is very ripe, the pectin breaks down and your jam won’t set.

**I used dried “culinary lavender” so essentially just dried lavender blossoms. I used 1 tsp, as Henry warns taking the lavender too far will result in a medicinal taste and dried anything can usually be pretty potent. I will bring it up to 1 1/2 tsp next time if I use dried lavender again, but I wouldn’t venture much further.

  1. Put a small plate into the fridge. You will use this later for a “wrinkle test”.
  2. Sterilize: Wash your jars and lids with warm soapy water and boil for at least 20 minutes. (Update on Januray 16th 2013: I’ve just been gifted another  jam book– Jam On by Laena Mcarthy. She instructs just bringing the water to a boil, then turning it off. So the 20 minute rule is out. Also, with the round lids of ball jars, you should just submerge them in very hot water, as boiling water can cause some melting.) You’ll want these to be a bit warm when you pot your jam, so don’t take them out til your jam is close to ready. Also, before using a ladle to handle the jam, and the sugar thermometer, I give those a 90 second dip in the boiling water after rinsing them well to avoid contamination. And of course, make sure your hands are nice and clean!
  3. Wash and stone your apricots and chop them up. I cut fairly big chunks, as I like a lot of texture, but you can cut them however you like or even just keep them halved, which I think I will try next time. Put them into your jam pot along with the jam sugar, lemon juice, and lavender (if using dried lavender, bundle it in a bit of muslin or cheesecloth. If using whole fresh sprigs as the original recipe calls for, you can throw them in the way they are). Over low heat, cook the mixture until the fruit is very soft and the sugar has dissolved. This takes about 20-25 minutes. Then bring the jam up to a boil over high heat and let it rumble without stirring til the thermometer reach the jam setting point (104.5 C/ 220 F). If you don’t have a thermometer, don’t panic, just follow step four.
  4. The Wrinkle Test: remove your jam from the heat and spoon a small amount across the plate. Let it sit for a moment, then push the jam with your finger. If it wrinkles up, it’s ready to be potted. If it is a bit runny or doesn’t form wrinkles, pop it back on the heat. Even though I have a thermometer, I so the wrinkle test as well.
  5. Remove your jam from the heat once it’s ready and allow it to sit for a few minutes in the pot. Pour your jam into warm, dry, sterilized jars. I find a widemouthed funnel helps with this. Of course, if you are using one, make sure to sterilize in the boiling water as well. Placewax paper discs over jam, and seal. Diana Henry advises this will keep for a year. It will probably be fine for longer, but I know my batch will be gone in the next few weeks, so I’m not too concerned. Once opened, keep refrigerated.