Tag Archives: Food Styling

I Say Tamale, You Say Whaaaa?

_MG_6062
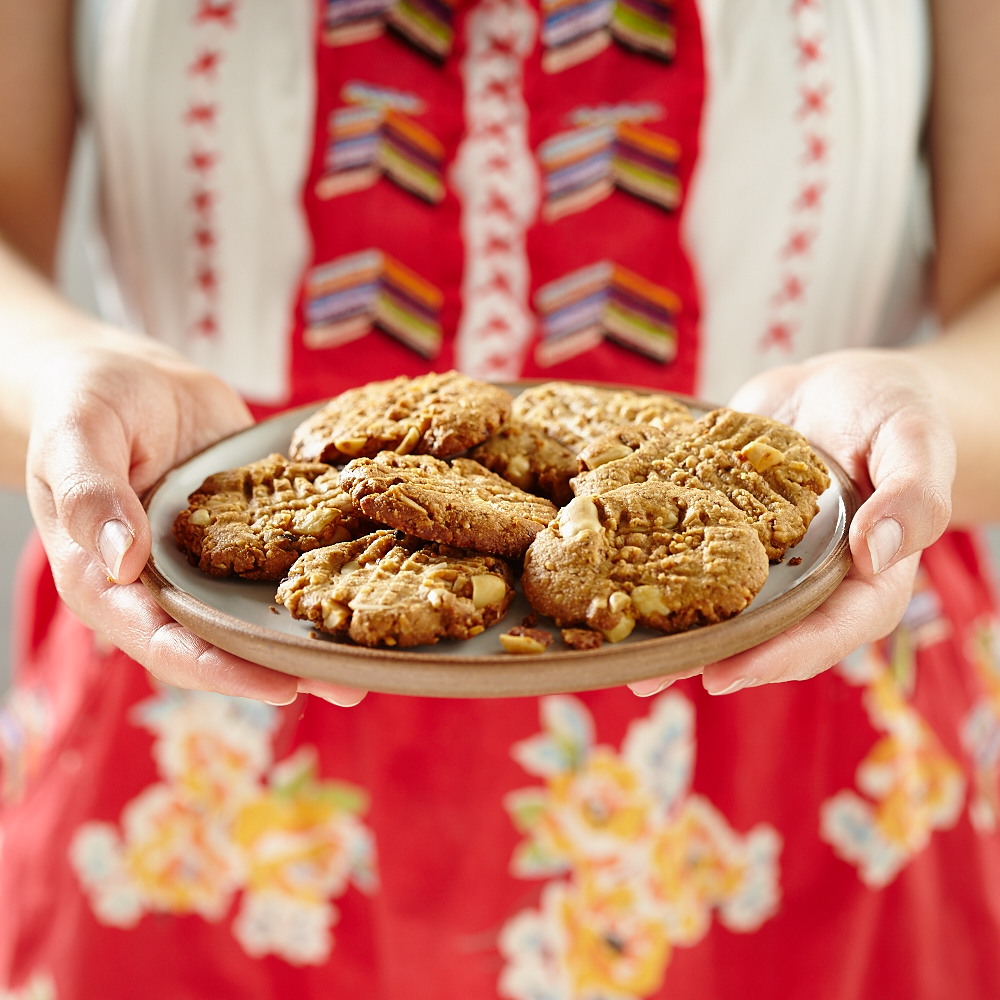
Photography by Tony Mott, Styling by Ali Nardi

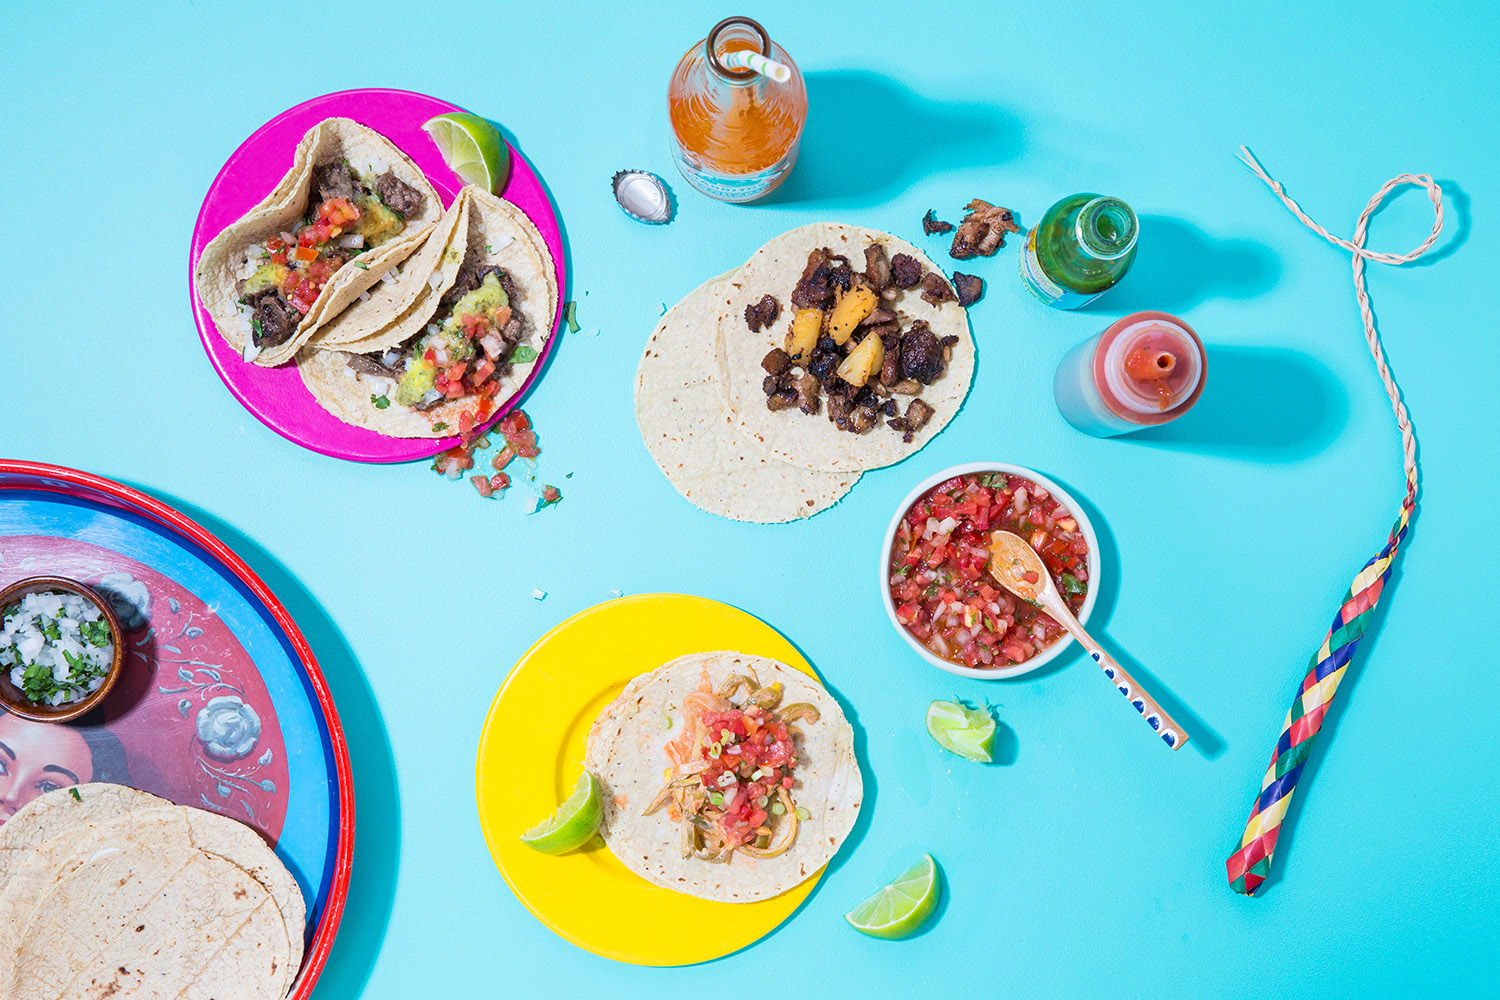
Recently my buddy Tony Mott and I teamed up to do a photo project with my local tortilla joint, La Tortilleria. Tony is a great photographer. He is also the only other person I know other than myself who feeds his pet, a Doberman named Duke, a raw food diet, so naturally, Tony and I make a totally weird awesome team!

La Tortilleria is a small mexican eatery and tortilla wholesaler in Kensington, Melbourne, that makes tortillas  from scratch. They also make awesome cactus and cheese empanadas!

_MG_5989

_MG_6033

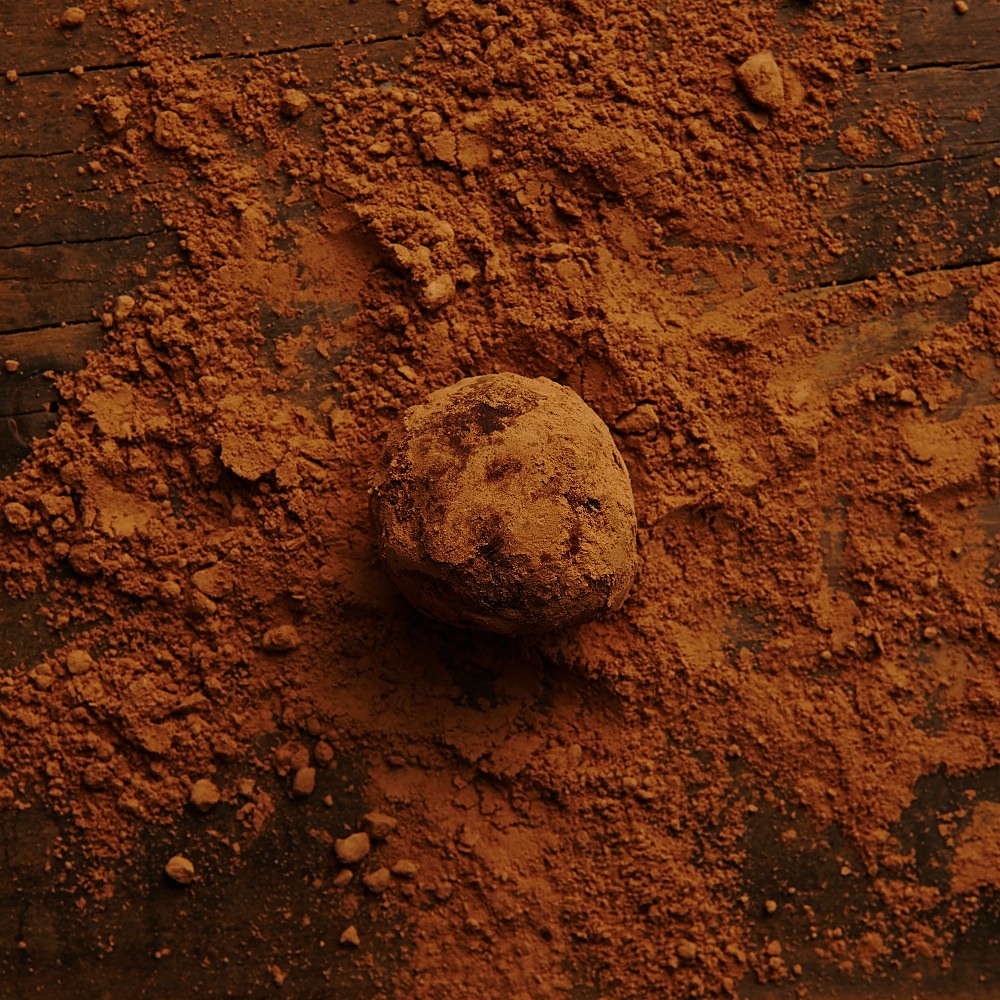
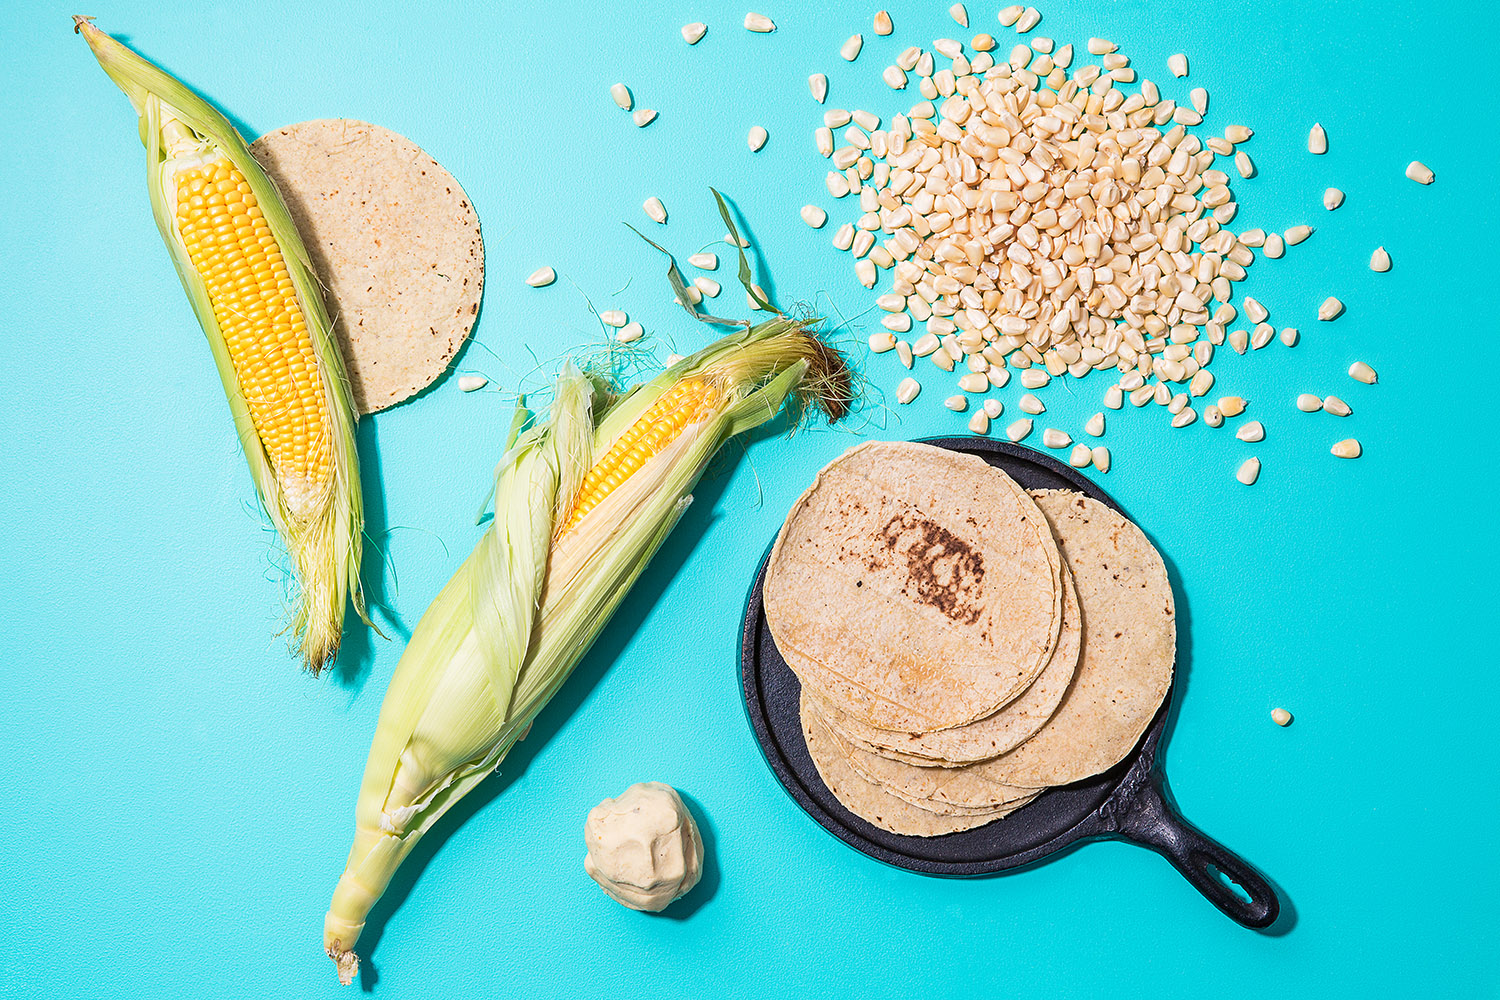
They grind the corn themselves (with the use of a crazy squeeky machine!) to make their own masa de maíz, which translates to corn dough). The dried version of masa de maíz, which is more commonly found, is called masa harina and translates to corn flour. It is often just referred to as masa.

_MG_6084

All of the meat they serve at La Tortilleria is free range and humanely treated, and they have awesome vegetarian and vegan option. They are really the local tortilleria for all of Melbourne along with El Cielo, located in the more industrial area of Port Melbourne, as fresh tortillas are not common here (If you are willing to travel to port melbourne, you’ll burn a much smaller hole in your pocket. A kilo of fresh masa from La tortilleria will run you $8 while it is only $3 at El Cielo, and just as delicious. They also offer blue corn products at El Cielo).

Anywho, as I styled and Tony took photos at La Tortilleria, we ate everything we were working with throughout the shoot as one does… My favorite bit (and my favorite photo), was the tamales. I LOVE tamales, and while they were a staple part of my $10/ day lifestyle during the post college year in San Francisco, they are really hard to find over here. It was Tony’s first time tasting one. Even the word was foreign to him, and I threw it around amongst my commonwealth buddies to see if they had ever received this package wrapped appealingly in dried corn husks or banana leaves (tamale strategy changes country by country). Surprise, surprise– they hadn’t. I needed to fix this situtaion.

So I had a group of friends to my place last week for Mexican style tamales. Everyone loved them as much as I hoped they would. As usual, my friend Sel-dawg just went for it and tried eating the corn husk as well. Talk about adventurous eater!

The one con about tamales: They are pretty labor intensive, and in a city like Melbourne, you’ll have to go to multiple shops to gather all of your ingredients. (I have provided a list of tamale ingredient suppliers in melbourne at the bottom of this post.) The trick to make sure it is all worth your effort and is cost effective as well– make them in bulk! They freeze well, and in our case, they didn’t last that long anyway. Tamales are a food you will want to share. These little parcels feel like gifts.

I’d like to share a few tamale tips with you, and let you know my new approach to the fat component that goes in the masa mixture. If you haven’t guessed it already, it’s coconut oil.

There are 4 components to your tamale dough.

  • Masa (in fresh or flour form)
  • Fat (traditionally lard or butter; shortening is another option– now it can be solidified coconut oil too!)
  • Stock to thin the dough out and give it flavor and moisture
  • Salt (sometimes this is already in the masa, so make sure to taste before you add extra)

I don’t use lard in my tamales, not because i am against lard, but because I like to know where my animal products come from, and the stick of lard from the supermarket most likely does not come from free ranged meat…. I stay away from shortening as a rule (just use butter in your pie crust!), and because Anders purchased an industrial sized bucket of organic coconut oil (at industry price :), it just make sense.

The filling for your tamale is often slow cooked pork, beef or chicken, in a sauce made from a variety of dried chillies (In Melbourne, you can find the chillies at Casa Iberica Deli in Fitzroy). Vegetarian tamales are just as delicious, and are usually filled with veggies and cheese.

I made delicious beef tamales in a red chilli sauce (and added a few non traditional extras– my adaptation in the recipe below).

I have a ridiculously large steamer that I acquired while styling for a cookbook, and being able to steam 50 tamales at a time was key to keeping my sanity, as opposed to doing them in tiny batches.

Below is the “approach” I use. I’ve given you measurements to make about 3 dozen tamales  (I made about 100 and found that one pack of corn husks from Casa Iberica Deli was more than enough!).

Smokey Beef Tamales  (adapted from multiple recipes, including Tyler Florence’s recipe on FoodNetwork.com, and tips from the chef at La Tortilleria)

yield: About 3 Dozen

Ingredients for dough using fresh masa (Tyler Florence has a good dough recipe if using masa flour here):

  • 1 kilo fresh masa
  • 250 grams solidified coconut oil (ratio of masa to fat should be around 4:1)
  • 1/2 – 1 cup beef or veggie stock if using fresh masa (if making beef tamales, just use stock from slow cooked beef (you’ll need a lot more if using masa harina base)
  • Salt to taste

Ingredients for filling:

  • 1 pound whole piece of free range beef for slow cooking– a roast or brisket works well
  • 100 grams dried chillies, tops and seeds removed (Pasilla, Ancho, and New Mexican chillies all work)
  • Enough stock (from slow cooking beef) or water to cover chillies
  • 2 onions, sliced
  • 1 head garlic peeled
  • 1 tbsp cumin seeds
  • 2 tspn smoked paprika
  • Juice of one lemon
  • Salt to taste
  • Enough corn husks for 3 dozen tamales (Case Iberica Deli)
  • Sourcream and lime or lemon wedges to serve
  1. Place meat, 1 sliced onion, 1 tspn salt, and half the peeled garlic in a heavy pot and cover with water. Bring to a boil, cover with lid and turn down to gentle simmer. Cook for 2 hours, or until very tender and falling apart. When finished cooking move beef to deep baking dish and shred with two forks. Reserve the liquid in pot and put through sieve. This is your beef stock.
  2. For the red chilli sauce, place your chillies, cumin seeds, smoked paprika,  remaining onion and garlic in a pot and add enough beef stock to cover (if you don’t have enough for dough and chillies, you can add some water too). Add salt to taste. Simmer for about 20 minutes or until chillies are very soft. Allow to cool slightly, then blend into a sauce with an immersion blender (or if you are scared of those, a normal blender). Add the lemon juice. Pour the sauce over the beef and stir to coat. Your filling is ready.
  3. For the tamale dough: in a large bowl, cream solidified coconut oil (or other fat) until fluffy. Add in fresh masa using hands. Add enough stock to make the mixture soft and easy to work with, but not too mushy. This part you have to play by ear a bit.
  4. Assemble the tamales! Soak your corn husks in warm water for 20 minutes at least. Start with the larger ones. Spread a thin layer of masa onto the smooth side of the corn husk. There will be a wide top to the husk that comes down to a point. Cover the top half (I don’t have the words to explain this bit very well, but there are some instructional videos on YouTube. Here is one I found helpful.)I use a wet palm but everyone has their preferred method. Place about a tblspn of filling on the masa towards the edge of the husk, and roll. Fold bottom end up and pinch top. If you want to get fancy with it, you can tie a corn husk bow around the tamale, which is also a helpful trick if you are layering two corn husks to get enough surface are (again the video is a very good resource!)
  5. To cook the tamales, places then in a steamer with the open side up (i place a bowl or foil ball in the center of the steamer to prop them on.) Steam for 1.5-2hrs or until tamale dough is nice and firm.
  6. To serve unwrap the tamale from the corn husk. I love them for breakfast with eggs and hot sauce. For dinner, I served them up with a fresh tomato salsa, sour cream with a bit of lime zest, and a lemon and lime cabbage slaw (just the cirtus, some salt, and some thinly sliced scallion– cuts through the richness of the tamale). Oh and hot sauce is a must!

Where to find tamale ingredients in Melbourne, Australia:

  • Casa Iberica Deli in Fitzroy has masa harina (masa in flour form), corn husks, dried chillies, spices
  • El Cielo in Port Melbourne has white fresh masa available during the week, and sells masa harina (blue corn as well). They also have dried chillies and an awesome collection of mexican products
  • La Tortilleria in Kensington has fresh masa, as well as a a good selection of mexican ingredients


Avoid the Sugar Hangover! Gluten Free Peanut Butter, Cacao Nib, and Coconut Cookies

FoodShoot-4466
Photography by Kim Mennen and Jake Lowe, Styling by Ali Nardi
Notice: WordPress is having a mini meltdown and currently won’t recognize spaces between paragraphs. Sorry for the big block of text.
Last night I had my ladies over. We used to get together to exercise, but now, we mainly get together to eat and drink wine, which suits us all just fine…
I made a wholesome and really flavorsome classic for them: a lemon and rosemary roast chicken with roast spuds, sweet potatoes, garlic, and kale (I will try to post that recipe soon). My friend Alice is off the sugar Sarah Wilson style, and inspired by Alice, I haven’t been eating much processed sugar either. It’s usually just a bit of fruit everyday and that’s been the deal. I feel pretty good, and I considered this fact while deciding what to make them all for dinner.
We were all full and satisfied, but then my friend Amelia went into the kitchen, and returned with a box of gorgeous Greek pastries. So gorgeous, that even Alice crumbled. What was meant to be just a bite of each turned into a bit of a feeding frenzy, but lady style, so it didn’t actually look like a frenzy…. and before you knew it, there were only a few measly scraps left–which I ate for breakfast this morning to try and cure the terrible sugar hangover I awoke to this morning.
Sugar. It’s super addictive. I consider myself very lucky that I’ve never really had a sweet tooth, but a few months ago, I slipped into dangerously high sugar-eating territory, and it was a major effort to scale it back. I was addicted for a bit, and I don’t want to go back to that place. I always felt tired, bloated, and desperate for something sweet. It truly made me feel hungover in the morning, without the benefit of actually being drunk the night before..
That being said, I never planned and still don’t plan to quit sugar completely, and by sugar, I mean fructose. I don’t like extreme dieting. I love almost all foods, and to cut out sugar completely would be cutting out a lot more than just the sweetness. It would be cutting out experiences, not to mention always being the difficult one at the dinner table– or any table for that matter.
The problem was just that I was having sugar way too often–like with every meal, and that didn’t feel so hot…
I read Sarah Wilson’s e-book, I Quit Sugar, and there were some strong points in there, and it definitely helped me cut down big time. But that point that stood out to me the most is that she drinks a cup of warm milk while sniffing incense when she wants a treat– and that sounds fairly dreadful to me.
I like to enjoy a hard cider or two on occassion when I’m out with my friends. I clearly enjoy Greek pastries once in a while. I like making birthday cakes for me friends, and enjoying them with them. And I’m certainly not going to miss out on eating a gelato here and there throughout the summer.
So sugar is in, but only when it is really worth it. I stay away from it unless I am eating a proper dessert that accompanies an occasion. The Greek pastry event was a bit over the top, but again, experiences! It wouldn’t be as much fun to share a stick of celery around the table. But that’s one night. And the rest of the week will have to be pretty clean (with the exception of Thanksgiving, which is  free-for-all in my book.
Maybe I should have mentioned at the top that this is not a post that is trying to keep you off the sweets over the holidays. I have no place telling you what you should or shouldn’t eat. I’m just letting you know what I enjoy. Really, what I am trying to say is: I think it is ok to eat bad stuff, as long as it’s usually and mostly eating good stuff. (And Thanksgiving is only once a year…)

peanutbutter cookie 3

peanutbutter cookies

One way I manage to do this is by keeping treats that are low in sugar and packed with protein and good fats in the house, like Tahini Date Refrigerator Snacks.  This week, I’m talking about Peanut Butter Cookies– really good ones, with mostly good stuff in them apart from 1/8 cup honey. They are gluten free, and have some delicious optional extras in them. They are based on a recipe from Elana’s Pantry–she does great desserts– but I’ve cut the sugar in half, made a few other changes, and added some extras to keep you full for longer and add some more interesting flavor.

Enjoy!

FoodShoot-4419
Gluten Free Peanut Butter, Cacao Nib, and Coconut Cookies
Makes about 12 cookies
  • 1 cup almond meal
  • ½ teaspoon salt
  • ¼ teaspoon baking soda
  • ½ cup crunchy peanut butter
  • 1/8 cup honey
  • 2 tablespoons butter, softened
  • 1 teaspoon vanilla extract
  • 1/2 cup unsalted roasted peanuts, roughly chopped
  • 1 tblsn cacao nibs
  • 1/4 cup unsweetened shredded or dessicated coconut
  1. Preheat oven to 350 F/ 180 C and line baking sheet with parchment paper.
  2. Combine almond meal, salt, baking soda, and shredded coconut in a bowl.
  3. In a separate bowl, beat peanut butter, honey, butter and vanilla extract, until light and fluffy.
  4. Combine dry ingredients with wet ingredients, and beat until well combined. Stir in cacao nibs and chopped peanuts.
  5. Scoop dough 1 tablespoon at a time onto lined baking sheet and press down with a fork.
  6. Bake at 350° for 10-15 minutes or until golden brown.

Melbourne is Immune to Global Warming: Sesame Zoodles

Photography by Kim Mennen Styling by Ali Nardi

Photography by Kim Mennen, Styling by Ali Nardi

It’s obvious at this point that Melbourne doesn’t feel like giving its people a break. We love you Melbourne, but you don’t seem to love us back. It’s spring, and you are still throwing weather tantrums. It’s immature, and inconsiderate and I expect it to stop. Everyone is cranky and depressed, and I’m hitting that point too. Luckily, because we aren’t in NYC, no one is calling it, “weather prone depression,” but really we all have a touch of it. So cut it out. It’s just plain rude.

I’ve gone ahead and made something springy anyway. I’m sick of slow cooking, and roasts. I don’t want to play with my oven tonight. I want to embrace the fresh veg of spring– gosh, I don’t even know what spring means anymore. What-eh-ver.

I was skeptical about zucchini noodles–a.k.a.”zoodles”– for a long time. While on a somewhat Paleo stint I scoffed at the idea. I LOVE pasta. It is hands down one of my favorite foods ever. I wasn’t about to disgrace pasta by trying to recreate it with a zucchini. I was just going to have it once as a while, not as a a small treat, because I’m incapable of eating small portions of pasta. (I allow myself an occasional pasta binge.)

Then someone I knew got hold of a “zoodler” and I became a believer. This little gadget is simple, but efficient, and the zucchini comes out in a very satisfying spaghetti cut. It isn’t spaghetti, but it isn’t so far off, and you could just think of it as a totally different food that happens to go well with pasta/noodle sauces. I’m pretty into them, and have to make them often to justify spending nearly $40 on a piece of plastic.  I keep them raw when using them so the flavor is more neutral. If you sautee them, you will end up with a stronger zucchini flavor, but that will work for some dishes. It all depends on personal taste.

So here it is: Sesame Zoodles. This recipe, adapted from Zygot Bookworks & Cafe originally published in Bon Appetit Magazine,  is a veggie-packed, no-cook recipe that absolutely reeks of spring. It’s misses a lot of sore spots as it’s dairy free, free from processed sugars (you’ll need to purchase “no-sugar added”/ all natural peanut butter if you are avoiding sugar), gluten free, vegan and raw, but still tastes really good… Take that Melbourne!

zoodles 3

I’ve been making this for years using udon noodles, and now I use zoodles with it. You can really add whatever veggies you like. With the sauce, some people prefer it more peanut buttery or thicker/thinner so feel free to play around with the soy sauce, vinegar and stock, but these ratios are what I like.

If we pretend it’s warm, maybe it will actually become warm…

Sesame Zoodles (adapted from Zygot Bookworks & Cafe)

Ingredients:

  • 1/2 cup chunky peanut butter
  • 1/2 cup soy sauce
  • 1 tblspn balsamic vinegar
  • 1/2 cup vegetable broth
  • 2 cloves garlic (or more), finely chopped
  • finely chopped red chilli to taste (optional)
  • 3 spring onions/scallions thinly sliced plus extra for garnish
  • 2 cups shredded nappa cabage
  • 1 head bok choy, well rinsed and thinly sliced
  • 1 red or yellow bell pepper, thinly sliced
  • 1 carrot, julienned
  • melted coconut oil or oil of choice to coat zoodles
  • 2 tblspn sesame seeds plus extra for garnish
  • about 3/4 zucchini per person to be made into zoodles–this recipe makes enough for 3 or 4 people.

1. To make the sauce, combine the first 5 ingredients, as well as the chilli if using. Make your zoodles and coat with a little bit of oil in  a large bowl. Add remaining vegetables and coat with sauce. Add sesame seeds. Garnish with extra sesame seeds and spring onions

Start the Week Right: Tahini Date Refrigerator Snacks

tahini balls 2

Photography by Kim Mennen, Styling by Ali Nardi

Clearly these are balls, but I’m too immature to use the word balls in the title for one of my posts…

I have been eating terribly lately! Lack of time means less making food at home, which means more eating out, which means eating a lot more junk, which means–you get the point. If I don’t take some time to make some healthy snacks to have in the house, and keep my fridge and pantry stocked with good stuff, as opposed to loading the freezer up with pizzas (it’s been known to happen), a vicious cycles begins. And I don’t think I’m alone…

I become addicted to the bad stuff, and lose interest in the better tasting homemade stuff, that also happens to be so much healthier, and make me feel so much better physically and mentally. I become sluggish, achy, and kind of cranky.

But then it becomes a bit too “icky” and I wake up one morning ready to start getting it right again. Today was a Monday, which I think is a great excuse for a fresh start. I ate good things all day, and then Anders gave me and my workout buddy a free personal training session (along with an elderly Chinese woman named Lily who came over to practice her English and then slipped her way into our training session). No, I am not a health nut who lives my daily life that way, but I try. Often, a workout just means I can then go have a greasy cheese burger after so I break even if you know what I mean, but I’m trying to get better at seeing the habbits in my life through for longer–not giving up burgers, or icecream–just having them less frequently. And I know having good snacks in the house helps me with this effort.

Anyway, the benders don’t really bother me that much, as long as I know I can squeeze my way back out of them, and button my pants again without it being too much of a struggle. The lack of time to make healthy food though is really still an issue at this juncture in my life, so finding some good, healthy, tasty snacks that aren’t too time consuming and don’t require me to turn on an oven can be tricky.

So thank goodness for Mona Hecke, author of The Lunchbox Revolution, and a former colleague who passed her “Protein Blast Balls” recipe onto me.  A kid’s lunchbox really is a great inspiration, as the point is healthy stuff without it tasting dull. I admit, I haven’t purchased her book and given it a good look, but based on how much I love this recipe, and the great feedback I received when I made them, I reckon it’s probably worth investing in.

tahini balls 5

There is no cooking, chopping, shredding, or even rinsing. You just need your ingredients, a measuring cup, and a food processor, and your ready to go. The whole process from start to finish is a quick 10-15 minutes, depending on how obsessive you are with getting those balls to look perfect. Your could also go with log shapes, or even squares. The choice is yours…. They last in a container in the fridge for ages, and you really only need one when you are after a pick me up. They are gluten free and dairy free. These are dense and delicious. The recipe calls for protein powder, which I realize isn’t something everyone has lying around. I only have access to it because Anders dabbles with the stuff… It ups the protein content of course, but it’s not gonna hurt anyone if you take it out.

tahini balls 4

tahini balls 3

Of course, I have made a few changes, apart from just changing the name…

  • I’ve taken out the agave, which I, and my fellow tasters, feel is unnecessary. The dates are definitely sweet enough on there own, and I don’t prepare food with agave. If you feel the need for extra sweetness, I recommend using honey instead, or adding a pinch of stevia.
  • Instead of almond meal, I’ve gone with LSA, which adds a bit more nutritional complexity.
  • I replaced goji berries with dried cranberries, because I prefer the taste, but also because they are a a bit out of my budget at the moment, and the budget for the rest of my life…  Also, someone I know will be eating these is allergic to them.
  • And finally, instead of just coating them in coconut, I recommend coating some in cacao powder.

Seriously good snacking grub…

Tahini Date Refrigerator Snacks

Adapted from The Lunchbox Revolution

Ingredients (Makes about 20 balls):

  • 1 cup LSA
  • 2 tbsp protein powder (optional/ vanilla protein works best for this recipe)
  • 1/2 cup dried cranberries
  • 1/2 cup shredded or dessicated coconut, plus extra to coat
  • 1/2 cup chia seeds
  • 10 medjool dates, pitted
  • Tahini to bind–I used roughly 1/3 cup
  • cacao powder to coat (optional)

Place everything into a food processor and blend until well ground and combined. Add tahini by the tablespoon until ingredients bind together. Shape into balls and roll in dessicated coconut or cacao. Store in fridge in an airtight container.

Mom’s Artichokes, Flannel and Boomboxes

Artichokes 2 AsiaPhotography by Asia Upward, Styling by Ali Nardi

First, a shout out to my buddy Asia Upward, who is so much fun to work with (plus I love her dog, Bear). She really knows how to photograph food and she has done some really lovely work for this blog. To see more of her work check out her website: Porkchop Photography

Whilst wandering through the Victoria Markets last week pretending I wouldn’t make my way to the borek stand and have my customary cheese and spinach borek straight from the oven (and straight from the hands of the borek nazi lady herself, who still doesn’t recognize me after the countless borkes I have purchased–it adds to the experience) I noticed that there were quite a few artichokes about the place, and I got excited and a bit nostalgic.

I love artichokes, and I really enjoyed eating them when I was a kid and my mom used to make them. They are in season in Victoria, and naturally that meant I would be eating them soon. By that, I mean I naturally expected them to be prepared for me soon–by my mom. And then it hit me. I have never cooked an artichoke! Okay, there might have been that one time in Italy after the artichoke fair in Rome, but did I actually prepare the bundle of chokes we brought back, or did I just sip 3 euro wine and sit on the windowsill watching my friend prepare them before eating them?

In any case, it was due time, cause mom is all the way back in Brooklyn and who else is going to make me artichokes? I wanted to make them the same way she always did when we were kids: simple, delicious–when you pull the leaves off and tear off the meaty bottoms with your teeth, then scoop the choke from the heart and eat the heart and a bit of the stem. So I called her, and she gave me the rundown, which I have passed on here.

After Asia Upward photographed the artichokes, we ate them, and Asia had a rush of nostalgia, cause sure enough, her mom used to make them the same way. And that’s when we realized artichokes are totally a 90’s thing. Perhaps they aren’t instantly recognizable as 90’s trend– the boombox, flannel, Pearl Jam–but that’s the decade they brought us back to.

So go grab some Artichokes at the market and and enjoy a blast to the past, and maybe plan to watch an episode of My So Called Life after dinner. I would portion two artichokes per person as part of a bigger meal. I served it up with a simple spaghetti with a bit of chilli flakes, parsley, and parmesan, and some bread to soak up the garlicky artichoke oil.

Artichokes 3 Asia

Mom’s Artichokes

Ingredients:

  • Artichokes (or two per person)
  • 1 or 2 cloves garlic per artichoke, sliced not too thinly
  • salt and pepper to tast
  • olive oil
  • water

Remove the really tough leaves from the artichokes and using a knife, peel the tough skin off of the heart and stem (leave about 2 inches of stem). Gently pull back petals a bit and push garlic slices down in the crevices. Place artichokes in large deepish pan in a single layer. Add equal portions of olive oil and water to the pan until you have about 3/4 an inch of liquid. Place a lid on the pan and bring the liquid to a gentle simmer (if the lid isn’t super snug or has a small airhole, seal the top with a layer of foil and then place the lid on). Allow to simmer for an 1 1/2 to two hours depending on how tough your artichokes are, turning occasionally (be gentle so the leaves don’t fall off). You should able to pierce the heart (right above where the stem meets the choke easily).

Your chokes are done and ready to eat! Just peel the petals off and pull of the tender bit of the pettle off with your teeth. Discard the rest of the pettle (it’s nice to have an extra bowl on the table for discarded leaves). When you get down the the spikey choke, scoop it from the heart, and enjoy the heart and the upper bit of the stem.

Flourless Pistachio Spice Cake

cake with wineThe best-worst thing I have been asked since being in NYC so far? “Excuse me, how do I get to ground zero?” I don’t have to explain the issue with that one. Other than that it is great. Weather is gorgeous, the food is great, and the people aren’t too cranky. My favorite bite so far was a really simple but beyond delicious Sicilian Panel Sandwich (i’m pretty sure the sandwich bit is the Italian American twist)– fried chickpea fritters  with a dollop of fresh ricotta and grated pecorino on a crispy light bun. I certainly couldn’t get away with a meal like that on a regular basis, but when I do eat something blatantly unhealthy, I go all in. And it’s not so often I get to spend time with my dad, who is a bit of an expert on the truly great yet hipsterless grub spots in Brooklyn. So when I am home, almost anything goes in the food category if I’m out for a meal.

Like I said though, I can’t or rather know I shouldn’t eat like that all the time, but I still crave the “naughty foods.” But you know my theory– If it’s gonna have bad stuff in it, make sure to add the extra good stuff too. And it’s just starting to get chilly enough to turn on the oven in NYC, which is the perfect reason to make this next recipe.

This is a Flourless Pistachio cake based on a recipe from Spice Trip: The Simple Way to Make Food Exciting by Stevie Parle and Emma Grazette. It’s a massive book and although it’s not particularly original–it’s more abut comfort food, with extra spice thrown in– it’s great way to get inspired in the kitchen. There are some cool spice-based health remedies in there as well.

Of course I healthied up their recipe a bit. I started by cutting the sugar in half (trust me, you won’t miss it). I also used coconut oil instead of butter and added cardamom to the recipe. I baked it in a much smaller cake pan than the one the recipe calls for (which i have provided measurements for below) and the result was a much taller cake with a crunchy outside and a slightly undercooked inside. This actually translated into a beautiful creamy texture on the inside and a nice firm shell with the called-for layer of pistachio crunch on the bottom. It worked. That being said, I am sure it is just as delicious when done in the original pan.

The original recipe is served with greek yogurt with orange zest. I have added those to the ingredient list below, but we all like it on it’s own (about 6 different people demolished tasted this cake).

pistachio cakeThis would go great with some fresh mint tea or even a bit of desert wine…

Flourless Pistachio Spice Cake

Adapted from: Spice Trip: The Simple Way to Make Food Exciting by Stevie Parle and Emma Grazette

Ingredients:

  • 150 grams ground pistachios, and 75 grams coarsely chopped pistachios
  • 200 grams almond meal
  • 120 grams coconut oil, soft but not melted (or softened butter)
  • 1 tsp sea salt
  • 2 eggs, lightly beaten
  • 110 grams brown sugar (about 1/2 cup packed)
  • 250 grams Greek yogurt (extra to serve)
  • 1 tbsp freshly grated nutmeg
  • seeds from 5 green cardamom pods, ground in mortar and pestle.
  • Orange zest for yogurt (optional)
  1. Preheat oven to 350 F/ 180 C. Grease and line an 8″ (20 cm) spring form pan with baking paper (I use a 6″ pan). You can use a smaller cake tin to make a higher cake as in the photo above. Just adjust baking time appropriately.
  2. In a medium bowl, beat coconut oil with an electric beater until smooth. Add ground pistachios, almond meal, and salt, and beat to blend. If chunks of coconut oil form, just work mixture with your hands to knead out any lumps. Press half of the mixture evenly into the pan.
  3. To the remainder of the mixture, add eggs, sugar, yogurt, and spices and beat until mixture is smooth. Pour mixture into cake tin and scatter chopped pistachios on top.
  4. Bake for 45 minutes or until a cake tester comes out clean and the cake is fairly firm if you press the top. If you make a higher cake in a smaller cake pan, make sure to cover the top of the cake after 45 minutes with foil so the top doesn’t brown too much.
  5. Allow to cool and serve with greek yogurt mixed with orange zest (optional). Keep leftovers refrigerated (I actually prefer this cake cold from the fridge).

Almost Vicki’s Ancient Grain Salad


FoodTest_Shot2_3788s

Photography by Kim Mennan, Styling by Ali Nardi


The worst part of jetlag is the boredom. Being awake at all those odd hours with no one to pester but the cat. No matter which country I am in, this time difference business really gives me the sh*ts. Maybe we should revert to a nocturnal lifestyle in Australia? Of course I am thrilled to be back in NYC for a visit, but these first few days are always a little trying.

Lucky for me, a laundry list of must-do’s has piled up, including putting out this blog post with a recipe someone has been eager to get (you know who you are), so I don’t really have an excuse not to be productive during these odd hours.

About a month ago, when Anders and I had both hit sheer exhaustion after working without a break for we-lost-count amount of days and the cold weather just kept hanging on, we both took a day off and headed to a new friend’s country property for a mini-get away. Vicki Jackson and her partner Simon have a gorgeous little plot in a quirky town with just a post office, a pub, and some endearing little leftovers, like an old out-of-use gas pump in someone’s front yard where the gas-station used to be.

Vicki and Simon were fantastic hosts, and Vicki is a vegetarian chef and author of the Squirrels Vegetarian Cookbooks. She has cultivated an impressive veggie garden, and cooks from a wood-fired stove, which really brings it up a level. When she says she uses whole foods, she means it.

As you may have guessed, Vicki prepared an outstanding veggie meal for us and one dish was a real stand out: her Ancient Grain salad. I don’t know exactly what Vicki puts in hers, but after interrogating her at the table, I attempted to re-create it, or rather make something similar and as tasty, and I am pretty happy with the results. I added a few extras: seeds and buckwheat– but the rest is really all Vicki. This is a lose recipe and the tartness can be adjusted to taste. I like it fairly zingy. You could add almond slivers or an extra grain or take out the barley and add more lentils to make it gluten free. If basil is in season throw it in. It’s a good one to play with.

Vicki’s walnut maple pie was also insanely good, but it’s probably best I don’t know how to make that one…

Photography by Kim Mennen Styling by Ali Nardi

Almost Vicki’s Ancient Grain Salad
Ingredients:

  • 1/2 tsp cumin seeds
  • 1/2 tsp coriander seeds
  • 1/2 cup dry green or brown lentils, soaked, cooked and cooled
  • 1/3 cup dry buckwheat, soaked, cooked and cooled
  • 1/3 cup dry barley, soaked, cooked and cooled (omit and add extra lentils and buckwheat for gluten free)
  • 1/4 cup pepitas (pumpkin seeds)
  • 1/4 cup sun flower seeds
  • 1/2 cup pomegranate seeds
  • 1/4 red onion or small shallot, finely chopped
  • a few generous handfuls of fresh parsley and cilantro/coriander, chopped
  • 1/2 cup crumbled feta or goat’s cheese (omit for dairy free)

For the dressing:

  • 1-2 tblsp pomegranate molasses or tamarind paste
  • zest and juice of one lemon (add in lemon juice gradually to adjust to taste)
  • generous tsp honey
  • a few tblsp olive oil
  • salt and pepper to taste
  1. Toast cumin and coriander seeds in a dry pan over low heat until dry and fragrant. Cool and grind in a mortar and pestle.
  2. Combine spices with the following 8 ingredients and gently fold in cheese
  3. For the dressing, whisk ingredients until well combined (taste as you go) and add to the salad. Enjoy as a side or a vegetarian main

One Thing Aussies Don’t Take the Piss Out of: American Punkin’ Pie

Photography by Kim Mennen Styling by Ali Nardi

Photography by Kim Mennan, Styling by Ali Nardi

First, I want to give a big thank you to photographer Kim Mennen, who has done some gorgeous photography for For the Love of Cabbage. She is super talented, and I am thrilled to have her on board! So thank you Kim!  To check out some of her other work, go here.

Now onto to that Punkin’ Pie….

pumpkin pie 3

Thanksgiving in Australia has been a bit of a dud so far. It’s my least favorite holiday politically, but far and away my favorite holiday for the food and it’s always a hard one to be away for. The food, however, is incredibly heavy, and it is crazy hot here in Australia by November. Understandably, I don’t want to spend all day sweating it out like the would-be-turkey in the oven in the summer.

So since my time here–(over a year and a half! cray cray….) I have been sneaking snippets of a the traditional thanksgiving meal into my everyday cooking. By snippets, I mean going straight to the best part: The Pumpkin Pie (although I am quite partial to sweet potato with marshmallow as well– yeah i know it sounds weird but it is seriously good).

Pumpkin Pie isn’t “a thing” here, and it’s almost funny how excited everyone gets when I make it. It is an American novelty, as is the way I say “coffee” apparently. Luckily, it lives up to the hype and everyone loves it. So I’m providing the recipe here–perhaps a bit late as Spring is upon us, but the weather is still a bit nippy. And since this one has coconut in it and it’s great cold from the fridge, why shouldn’t pumpkin pie be a hot weather food? I’ve managed to turn it into a breakfast staple at ours…

I don’t muck around with the concept of pumpkin pie too much. It’s one of those things that is great as is, and in my opinion, attempts to jazz it up just don’t really make it any more special than the straightforward version. So my approach to the pumpkin pie was to make it healthier, while making it taste as similar to the original, which was surprisingly easy. It is dairy free, gluten free, and if you are counting honey as Paleo, it’s Paleo as well.

It’s one of those cases where the back of the can got it right. I defer completely to LIBBY’s Famous Pumpkin Pie recipe, cause that Libby knows what she’s talking about. I just toggled a few things:

  • -The condensed milk gets switched out for coconut milk to make it dairy free and add the benefits of coconut
  • the sugar gets swapped out for honey
  • I use steamed pumpkin (squash), or sweet potato, or a combo of the two instead of the canned stuff (which honestly isn’t that bad…)
  • And the crust is a protein packed and healthy gluten free almond meal and coconut crust

I tried almond meal based crust recipes and had to make a few tweaks to get it to a good place, but I’m feeling good about this one, which is based on a recipe from Elana’s Pantry. It doesn’t deliver the same firm texture as a traditional crust, but it tastes great and gets a nice gentle crunch around the edges.

I’m not a huge fan of healthy versions of desserts that don’t taste like they should. I’d rather just not have dessert at all if it doesn’t taste like a dessert. And that’s why I’m sharing this pie recipe. It is right on the mark. I suggest serving it without letting everyone know you’ve adjusted it, so the skeptics won’t go in biased.

As they say here, this dish is a cracker!

Eat it for Breakfast Pumpkin Pie

Adapted from the recipe on the back of the can of LIBBY’S canned pumpkin/ Crust adapted from Elana’s Pantry

Ingredients:

For the crust:

  • standard 9-inch pie dish
  • 1 1/2 cups almond meal
  • 1/2 cup dessicated unsweetened coconut
  • ½ teaspoon good salt
  • 2 tablespoons melted coconut oil
  • 1 egg, lightly beaten

For the filling:

  • 1 teaspoon ground cinnamon
  • 1/2 teaspoon ground ginger
  • 1/4 teaspoon ground cloves
  • 1/2 teaspoon salt
  • 1 1/2 cups mashed pumpkin (squash) or sweet potato (start with 1 1/4 lbs to get 1 1/2 cups– peel, steam, and mash with fork)
  • 2 large eggs
  • 3/4 cup honey (if you like less sweet, subtract 2 tblspn)
  • 1 cup coconut milk
  1. Preheat oven to 350 F/ 175 C
  2. For the crust: In a bowl, combine almond meal, dessicated coconut, and salt. Add egg and coconut oil and mix to blend. Use fingers if needed. Press into a pie dish and blind bake for 12-15 minutes, until firm. Allow to cool completely.
  3. For the filling, mix ingredients in a bowl until well combined. Pour into cooled pie crust. Place on baking tray and bake for 60-70 minutes or until center doesn’t jiggle. Allow to cool completely.
  4. In cooler weather, just leave it out for a few hours. In warmer weather, pop into the fridge for a few hours. Then serve with whipped cream, or if avoiding dairy, whip up some coconut cream.

Just Beet It! Beets Three Ways

Photography by Clare Plueckhahn, Styling by Ali Nardi

When I met Anders, I was on a diet of beets (“beetroot” over here in Australia, pronounced bee-chroot or these savages won’t understand you…) with a few other flares, like arugula, parmesan, and balsamic vinegar. I was obsessed and it was the only thing I craved. I looked forward to waking up to eat beets for breakfast, packed some for lunch, and finished my day with a nice beet dinner– before I went out wandering the streets of Rome with a Peroni and cigarette in tow… (meanwhile, I am still recovering from two glasses of champagne Saturday night and it is already Monday afternoon…. I miss youth!).

Photography by Jesse Hisco

Looking back, it was pretty weird and a little gross, but something we still joke of fondly as the “beet-phase” when we make them. Since those days, my addiction to both beets and cigarettes have subsided, but I still eat beets in moderation, and not always in that same old salad. They are also just a gorgeous veg, and I get them into photos whenever I have the chance.

At the green markets you can sometimes find gorgeous candy striper (chioggia beets), yellow and white beets. They are great just grated up raw into a salad, in fresh juice,

Or you can put a bit more time into to make something extra special and use them in my following three recipes: Beetroot Pizza with Balsamic Reduction (pictured above), Winter Veg Salad with Pear and Blue Cheese (pictured above), and My Spiced Pickled Beets (sorry, no photo). Enjoy!

Beetroot Pizza with Balsamic Reduction

Recipe by: Ali Nardi

Ingredients:

  • 1 x pizza base (if you’d like to make your own, see recipe for  Whole Wheat Pizza Dough here)
  • About 3/4 lb raw beets (any kind you like), scrubbed and trimmed
  • A few tbspn Reduced Balsamic Vinegar (can purchase or make at home)
  • 1/4 red onion, thinly sliced
  • fresh parsley
  • shaved parmesan cheese
  • Olive oil
  • salt and black pepper
  1. Preheat oven to 400 °F
  2. Place beets on foil on a baking tray and drizzle with olive oil. Add some good salt and black pepper and close the foil to make a parcel. Roast in oven until you feel just a bit of resistance when you insert a paring knife into the beets (time will vary on size of beets but can take anywhere from 20 mins to an hour depending on their size).
  3. Allow beets to cool and set oven to highest possible temp. Peel beets and slice into 1/4 inch thick rounds
  4. Brush pizza base with olive oil. Layer beets onto base, brush with oil. and sprinkle with a bit of black pepper and salt. Bake until pizza is ready (about 12 minutes in my oven).
  5. To your taste: Scatter fresh parsley leaves and parmesan shavings over top of pizza. Drizzle with a bit of Olive oil and Balsamic reduction and serve immediately

Winter Veg Salad with Pear and Blue Cheese (Serves 2)

Recipe by: Ali Nardi

This salad is really about what you feel like putting in it, but I will give some guidelines. This is a very hearty salad and would be a great vegetarian main

Ingredients:

  • 6 baby beetroot, scrubbed and trimmed, and halved lengthwise (leave a bit of the green on)
  • 1 medium sweet potato, cut about 1/3 inch thick or however you like
  • 2 small parsnips, cut into horizontally into 2 inch pieces (quarter the thicker pieces at the root end)
  • 1 carrot, shaved into ribbons with a veggie peeler (I used purple and yellow carrot in the photo above)
  • 1 pear, thinly sliced
  • thinly sliced red onion
  • a few handfuls arugula (rocket)
  • about 1/4 cup crumbled blue cheese
  • salt and pepper
  • Olive oil and balsamic reduction to dress (or just regular balsamic vinegar)
  1. Preheat oven to 400 °F
  2. Place beetroot on a baking tray, and sweet potato and parsnip on a separate baking tray. Dress veggies on both trays with olive, salt, and pepper, and roast until tender: about 20 mins, moving veggies around on once or twice.
  3. This salad can be plated really beautifully on individual plates, or you can just toss it all in a bowl and treat it like any other salad. In any case, arrange the veggies, pear, rocket and blue cheese how you like, and dress with olive oil and balsamic reduction. Sprinkle with freshly ground black pepper.

My Spiced Picked Beets

Recipe by : Ali Nardi

These are so good in a green salad, or on bruschetta with ricotta, feta, or creamcheese, or chopped up in a grain salad.

Ingredients:

  • 1 cup red wine vinegar
  • 1/2 cup red wine
  • 1 cup honey or sugar
  • 2 star anise
  • 1 cinnamon stick
  • 3 cloves
  • 2 medium sized beets, peeled cut in half, and sliced about an 1/8 inch thick

In a pot big enough to hold all ingredients, add everything but the beets. Cook over a low heat until the sugar/honey is completely dissolved, and then bring to a gentle simmer. Cover and allow to simmer for 5 minutes. Add beet slices, and bring to a boil. Turn off and allow to cool completely before removing spices and transferring to a container. Allow to sit for a week in the fridge before using. These will last a long time, and just get better with time.